Molding and casting
Table of content:
1 - Group Assignment1.1 - Preparing the epoxy
2 - Individual assignment
2.1 - Designing the mold
2.2 - Milling the mold
2.2.1 - Surfacing 2.2.2 - Roughing 2.2.3 - Finishing
2.3 - Making the negative mold
2.4 - Making the positive mold
2.5 - Final results
Heroshots for this week
Group Assignment
In this week of molding and casting, we were suppose to try different molding and casting material and also read their technical and safety
datasheet for the group assignment.
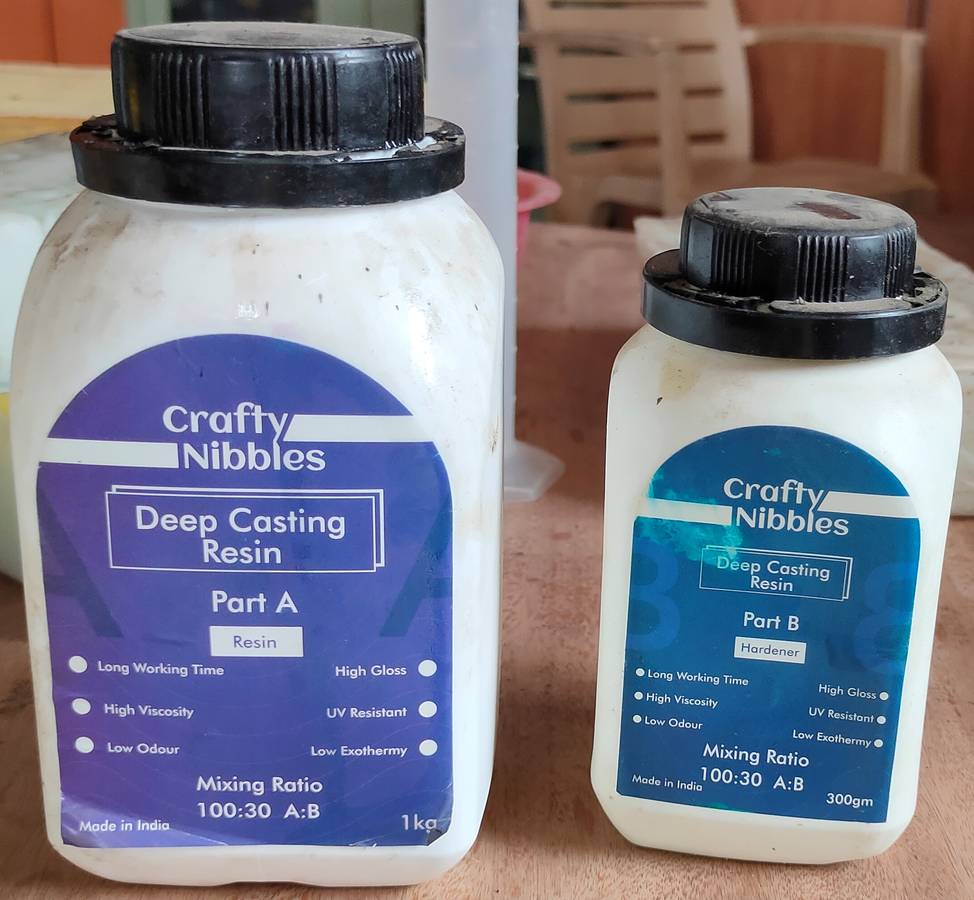
I was assigned to test on one of the epoxy resin we have in our lab. This is the resin: Crafty Nibbles epoxy i used for testing,
I am mentioning some of the technical details and safety measurements for the epoxy resin i used, for more details of the crafty nibbles epoxy
resin, check the description of their website: https://createout.in/product/crafty-nibbles-deep-casting-resin/
- Epoxy resin comes in two parts, which you need to mix them in the ratio suggested by the company. One part is resin(A) and another part
is curing agent(B), also known as hardner. In my case i had to mix 100 oparts of resin with 30 parts of hardner or we can say the ratio of
resin to hardner was approximate 3:1.
- After mixing part A and B you need to stir the mixture for at least 3 minutes.
- The working time of the epoxy is 60 minutes, that means after mixing the epoxy and hardner, use that for casting within 60 munutes.
The gel time is 90 minustes, that means between 60-90 minutes the mixture will become thicker and thicker, you can use that for casting but
it won't be in its most liquid form so the epoxy won't reach into every corner of the negative mold.
- if cured at 25° it takes 24 hours to dry
- You must wear gloves while working with the epoxy. From my personal experience, if a freshly mixed epoxy is spilled in your hand, you
can easily rinse it off by washing your hands with water and soap. But if the resin is cured for a few hours and then it is spilled in your
hand, you need to deeply rinse your hands off with Isopropyl Alchohol.
- it is suggested to wear goggles while working with epoxy
Preparing the epoxy
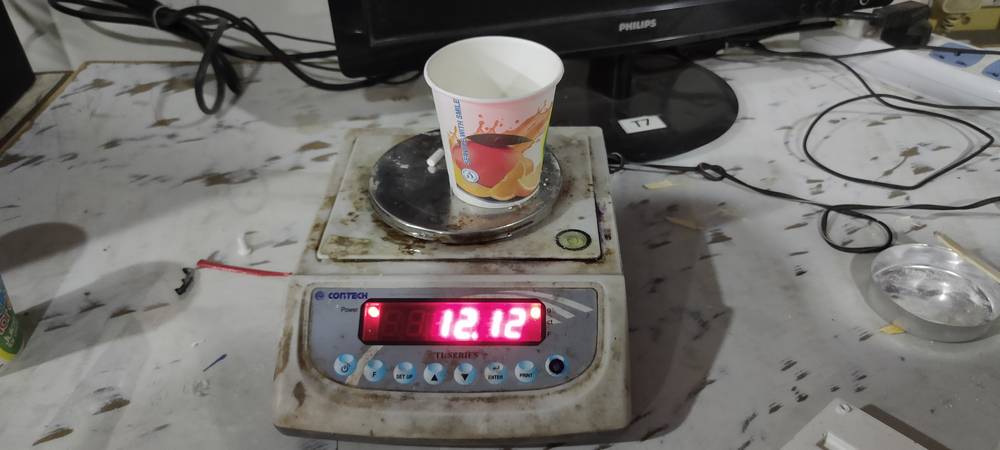
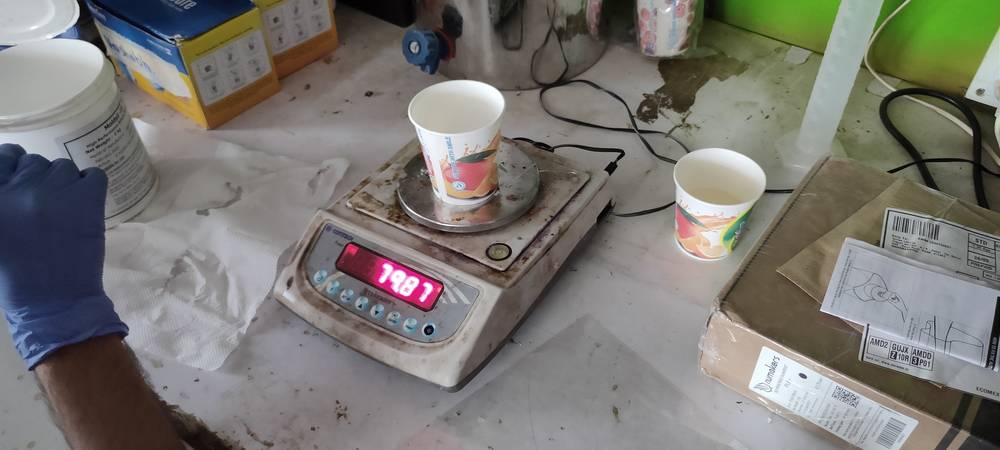
We had some test molds in our lab, which the previous students had made so i decided to test the Crafty Nibbles epoxy on a small hammer mold,
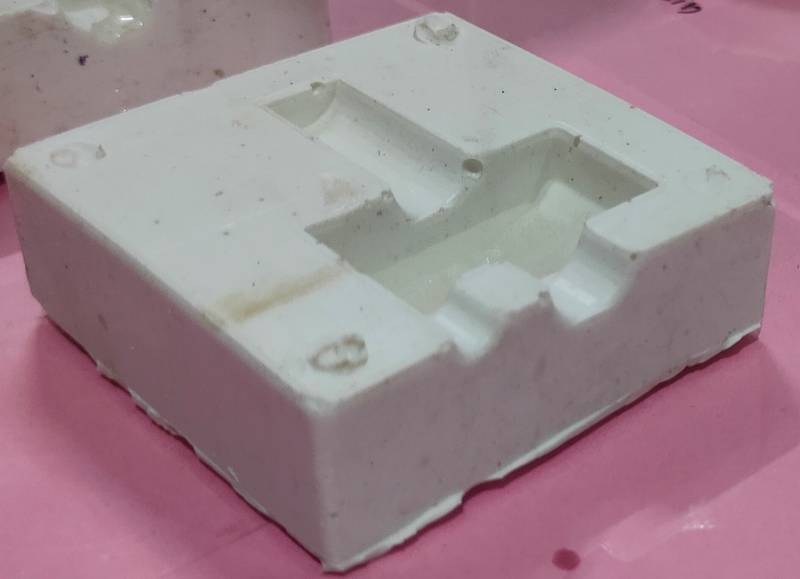
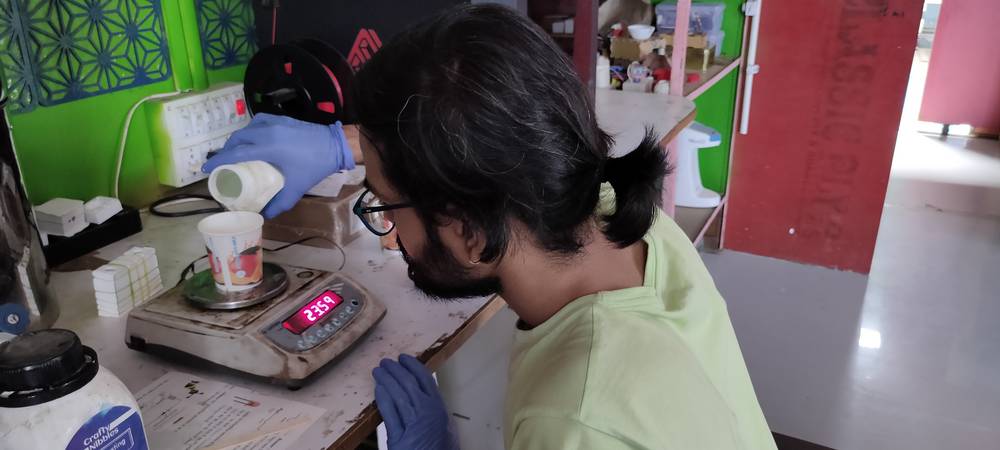
First i had to find out how much grams of epoxy would be consumed to fill up the test mold. So what i did was fill the test mold with water,
measured the weight of the water which was around 9 grams so i took a tentative figure that i would need 12 grams of epoxy, considereing the
density of the epoxy is more than water.
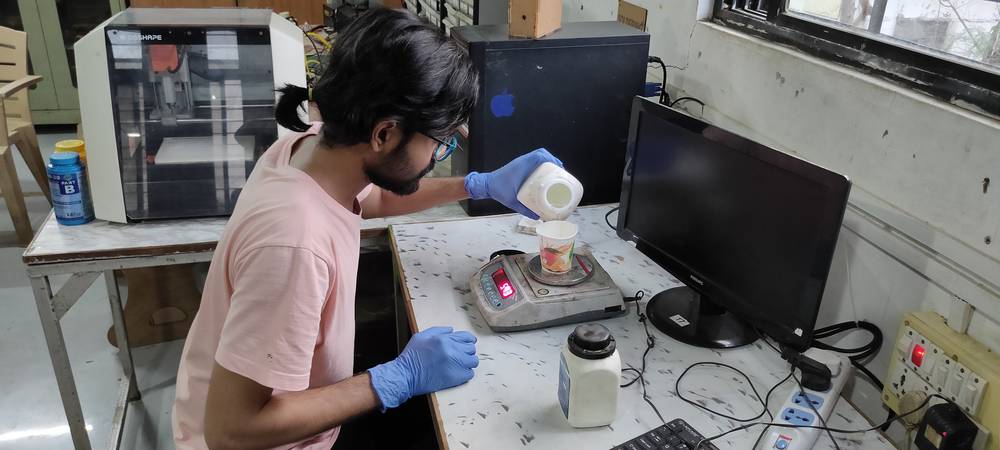
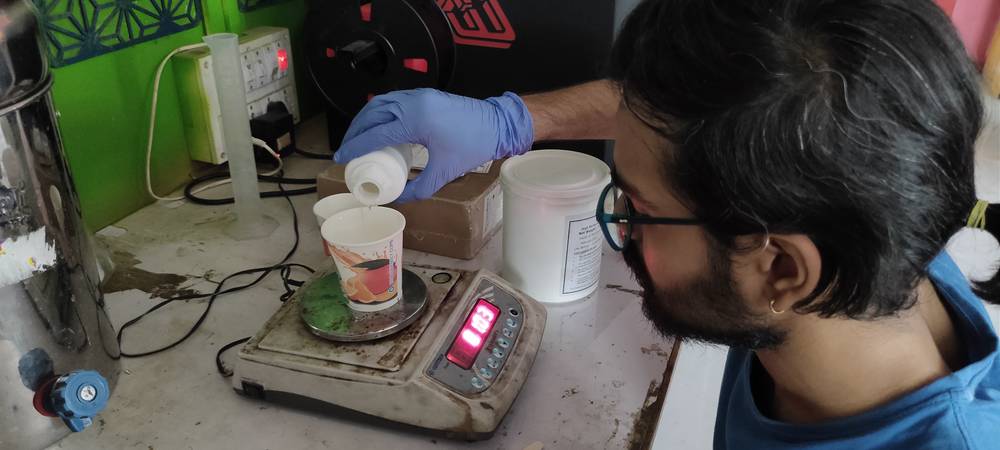
As mentioned above, i had to make the epoxy of 12 grams with resin and hardner in 3:1 ratio, so the ratio was 9 grams of resin with 3 grams
of hardner. I then started mixing the resin and hardner in the ratio mentioned and stirred them for around 3 minutes,
The resin,
The hardner,
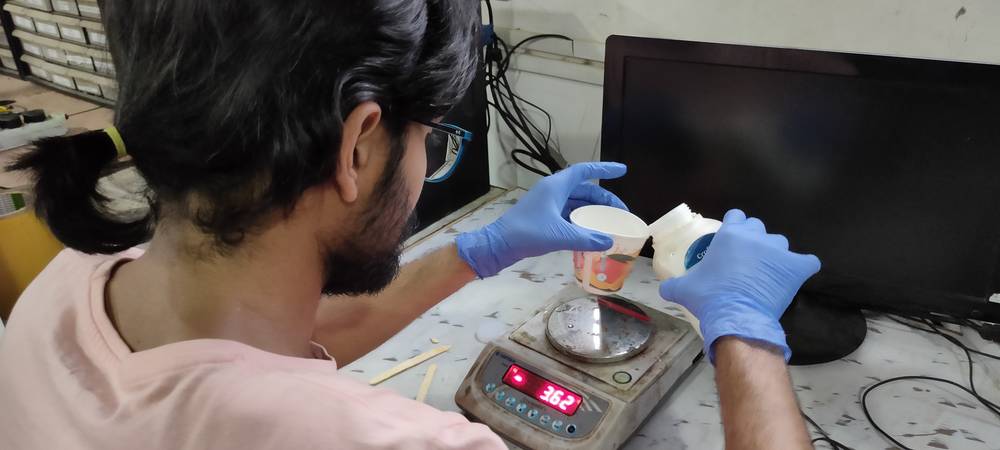
The mixture,
After mixing the resin and hardner, i stirred the mixture for arounf 3 minutes,
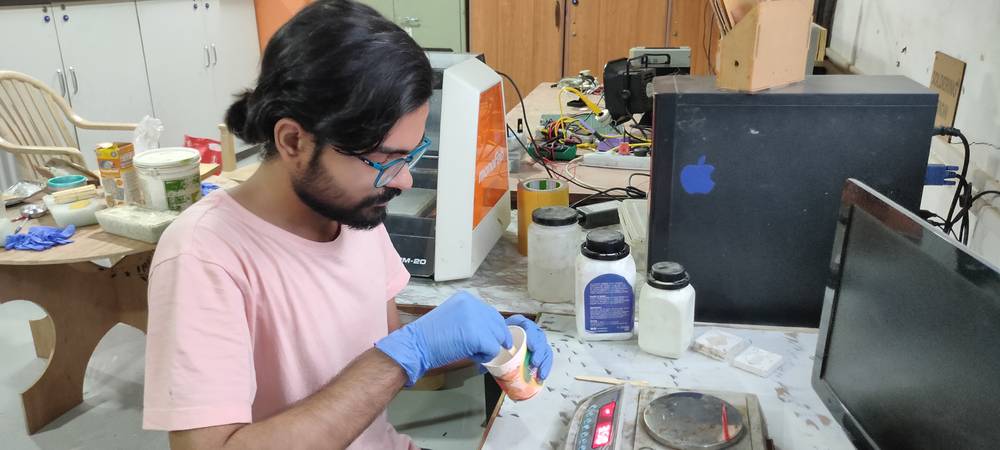
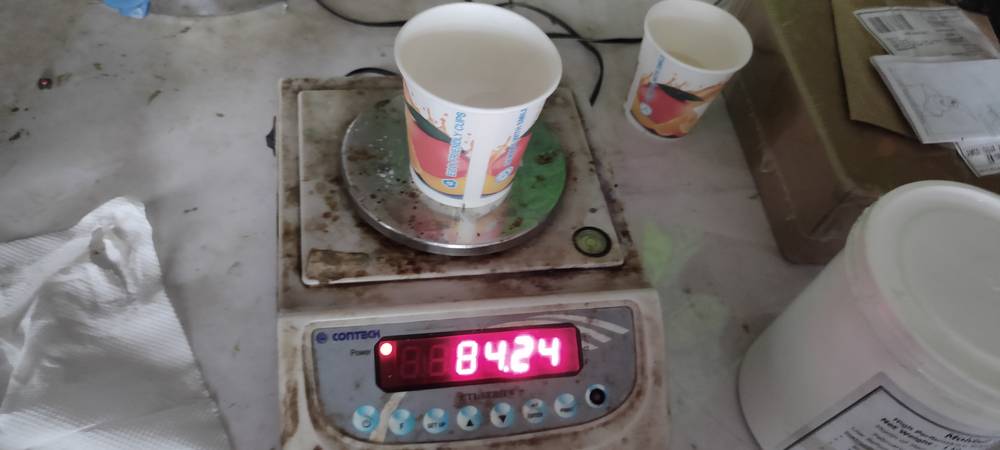
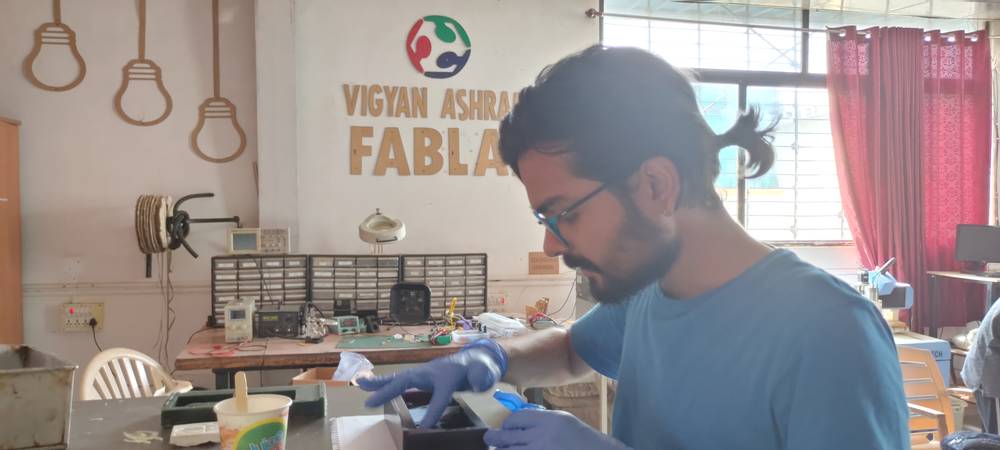
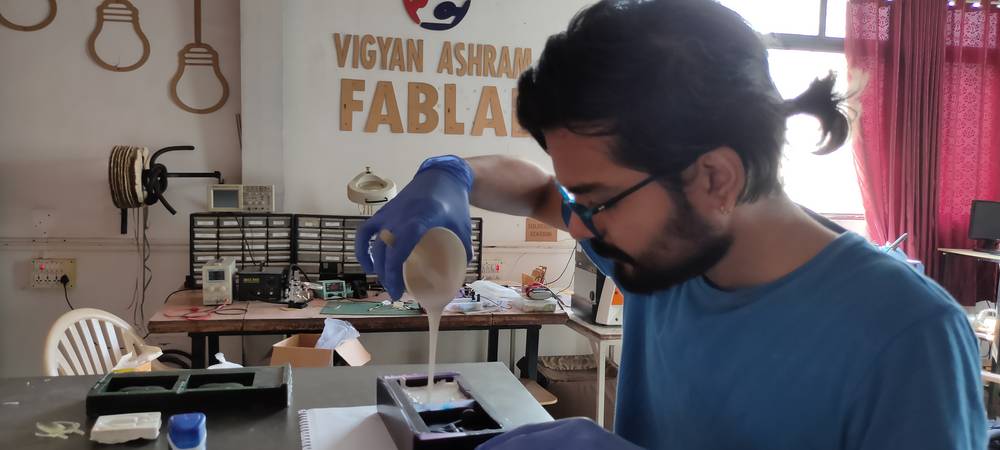
AFter the epoxy was ready, i started to pour the epoxy into the mold,
Here are the other different casting material my colleagues tested,
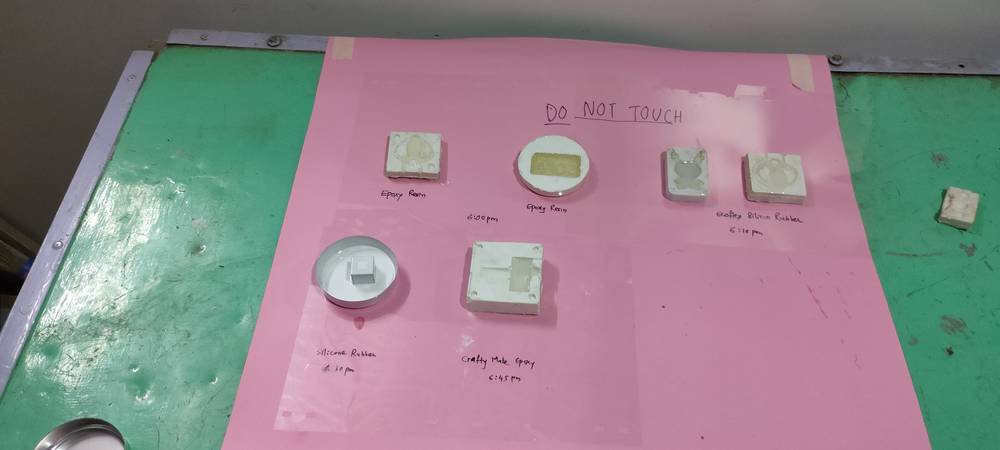
It took about 8 hours to cure the expoxy because the mold was very small.
However you should always wait 24 hours before removing the epoxy if your
mold is large.
Link for group assignment page:
https://fabacademy.org/2022/labs/vigyanashram/groupassig/groupassignment7.html
Individual Assignment
Before jumping into describing what i did in this week's assignment let me give a brief explaination about the negative and positive molds,
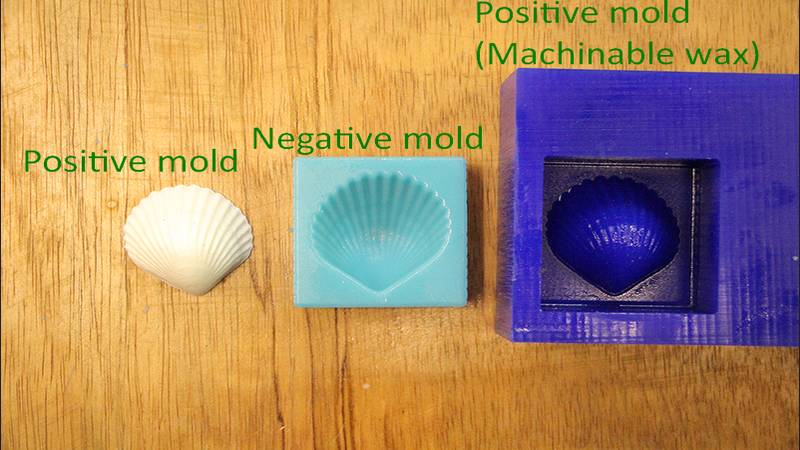
so you first make a positive mold on the machinable wax.
Then you make a negative mold with the help of casting material like silicon rubber. To make the negative mold, pour the casting material into
positive mold you made onto the machinable wax.
Then you make final positive mold with the help of casting material like expoxy, hydrostone etc. To make the positive mold, pour the
casting material into the negative mold you prepared.
In the individual assignment, we had to design, mill and cast a part. This assignment is divided into four parts,
Designing the mold
Milling the mold
Making the negative mold
Making the final model (positive mold)
Designing the mold
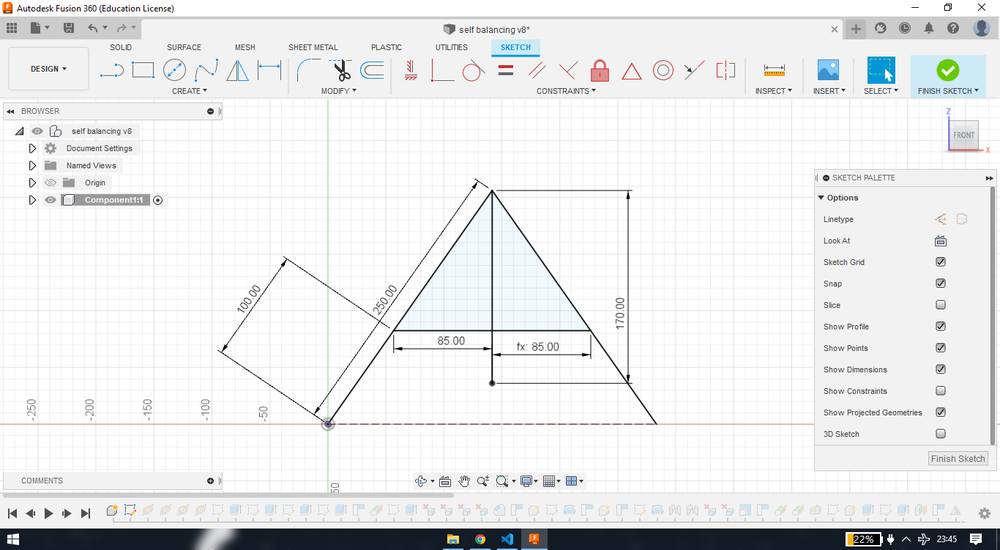
I first had to decide what i want my final model to be and then had to make a mold considering the final model. I wanted to make a self balancing
toy as my final model. I came accross this youtube video,
where the person made a self balancing toy with barbecue sticks and used glue gun sticks as weights. I started making the model with the
same dimensions as he was using for the barbecue sticks,
Then with Boss extrude feature, extruded the lines,
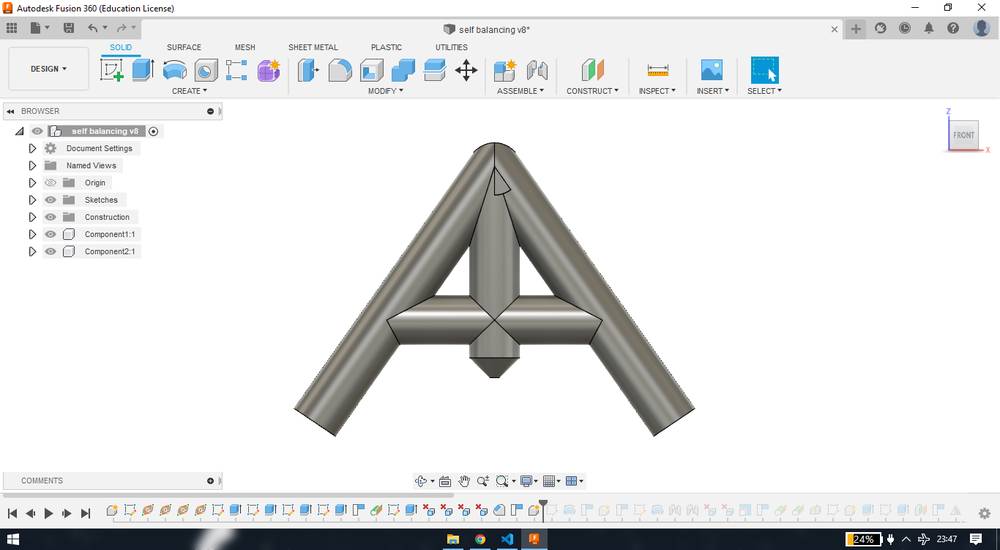
and then added weignts and my final model was ready,

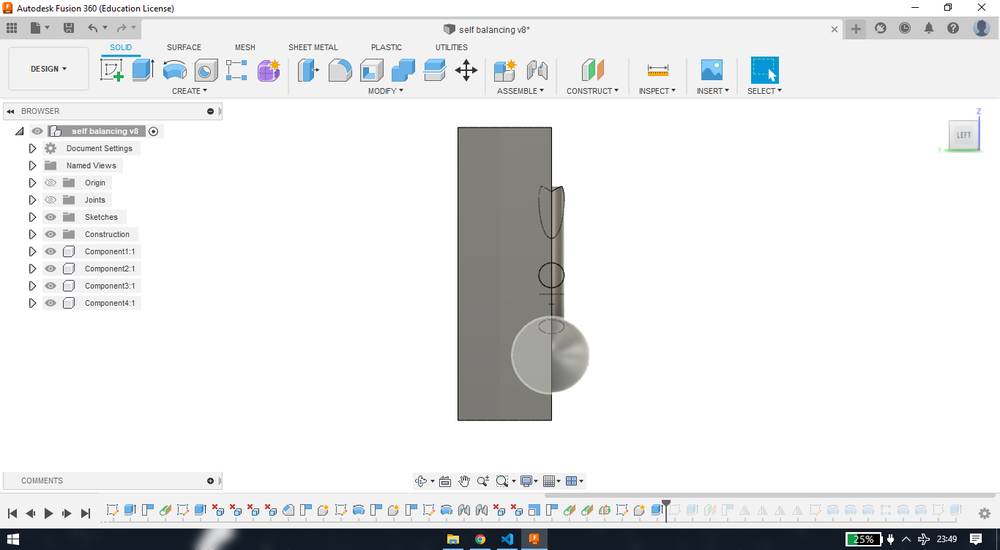
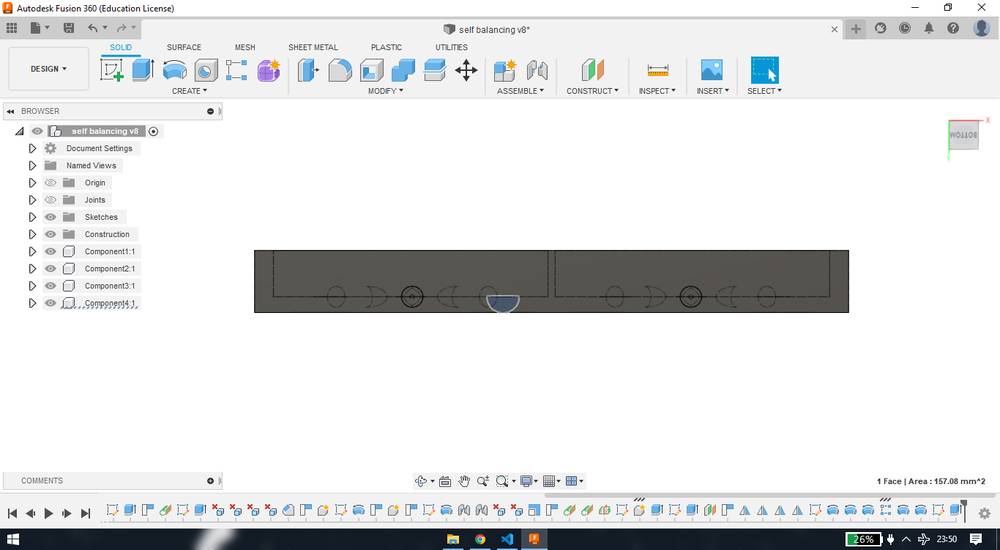
Since the final model was very huge, i scaled it down and made border around it to convert it into a mold. I also added male-female joints into the
mold which will act as lock when i press both side of the negative mold together, you'll
get a better idea about this later,
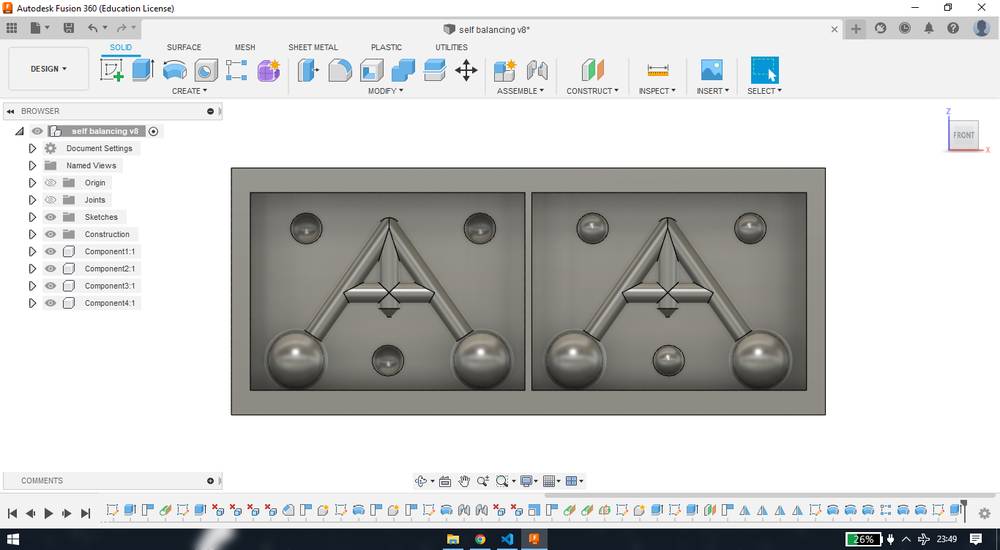
Instead of making a pipe like structure to pour the casting material, I made the border passing through the weight and that wil act as a entrance
for the casting material to get poured. Usually, while making the mold, you need to give the provision for two holes, one for pouring the
casting material and other for the air to vent out while you're pouring the casting material. With the border passing through both the weights,
my design was serving that purpose.
after the mold was ready, i reduced the thickness of the mold from one side so that there is only 0.1 mm space left at the end of the design(the
end of the design is the female joint),
because the thickness of the machinable wax was twice the size of design and the milling machine was only going to cut upto the female joint,
the rest of the space below the female joint was anyways going to be extra,
Exported the design as .STL format and my mold was ready for the milling.
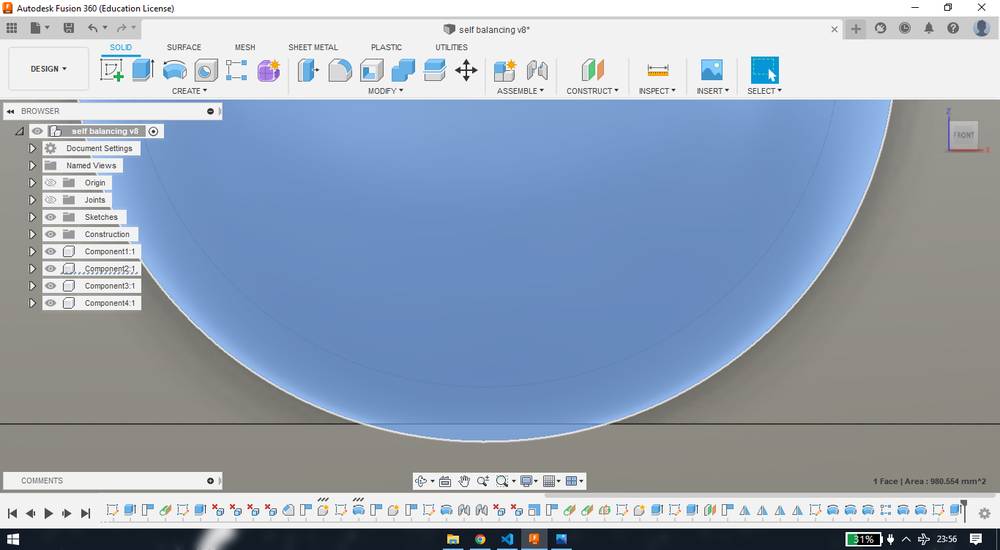
Here is the overview of the self balancing toy (mold),
Here is the overview of the self balancing toy (model),
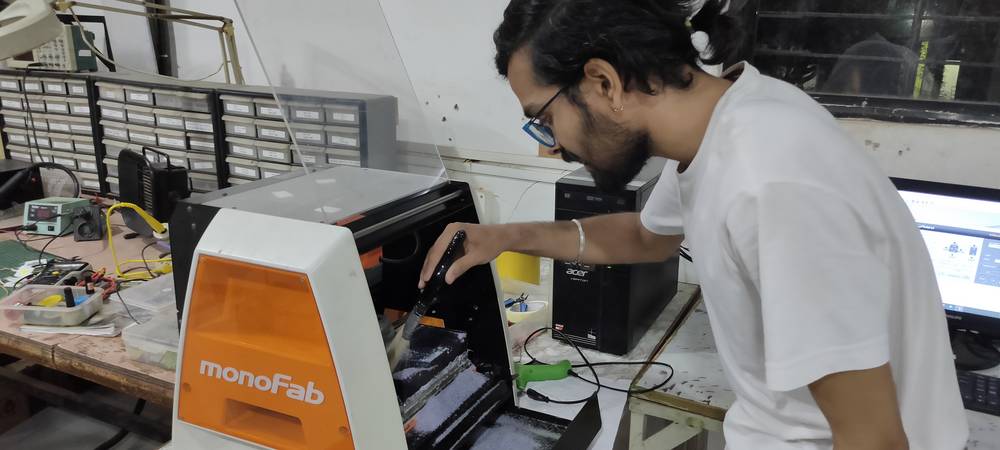
Milling the mold
I decided to mill the machinable wax into the Roland SRM 20 machine. To move the XYZ axis of the spindle and to set the origin, i was using
V-panel software and for generating the toolpaths for the mold, i was using Modela Player 4 software.
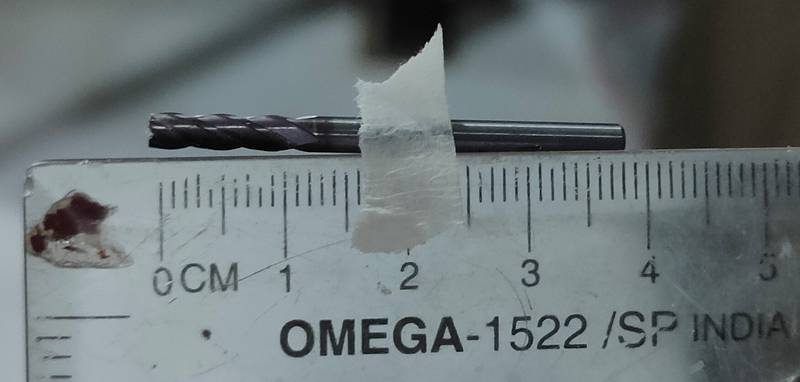
Milling the machining wax is divided into three stages: Surfacing, roughing and finishing. I used 1/8 inch flat endmill for all the three
stages,
Surfacing
Before generating the toolpath, i first fixed the machinable wax into the machine. Unlike the PCB/coper clad, a 3M double sided tape is not
enough to keep the machinable wax in it's place so i had to use hot glue in addition for better adhesion. I glued on the front, left and right
side of the wax and i also glued the sacrificial layer because the vibrations can remove the sacrificial layer too,
Surfacing means removing few layer from the top surface so that you'll get a smooth and even surface from the top. Here is how i generated
the toolpath for surfacing,
Open the STL file of the mold,
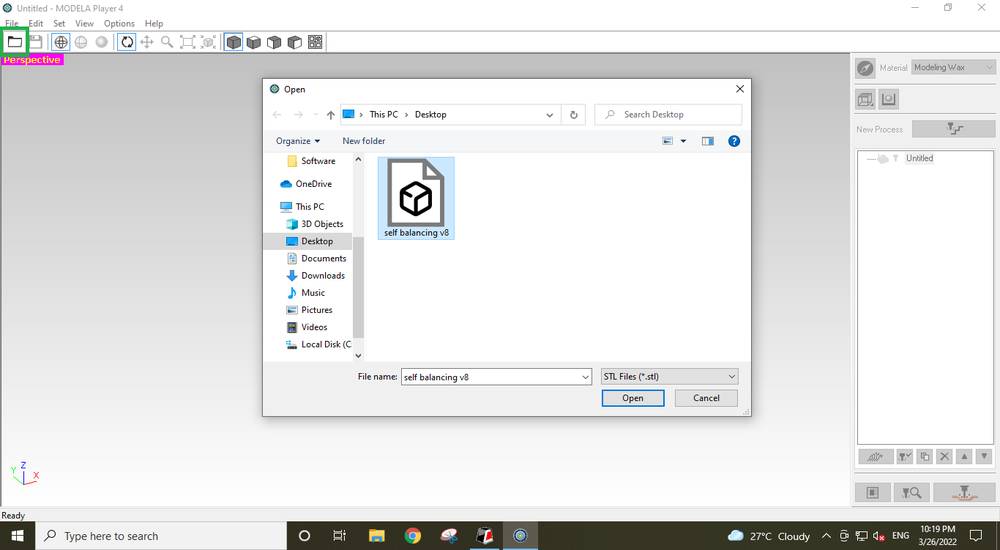
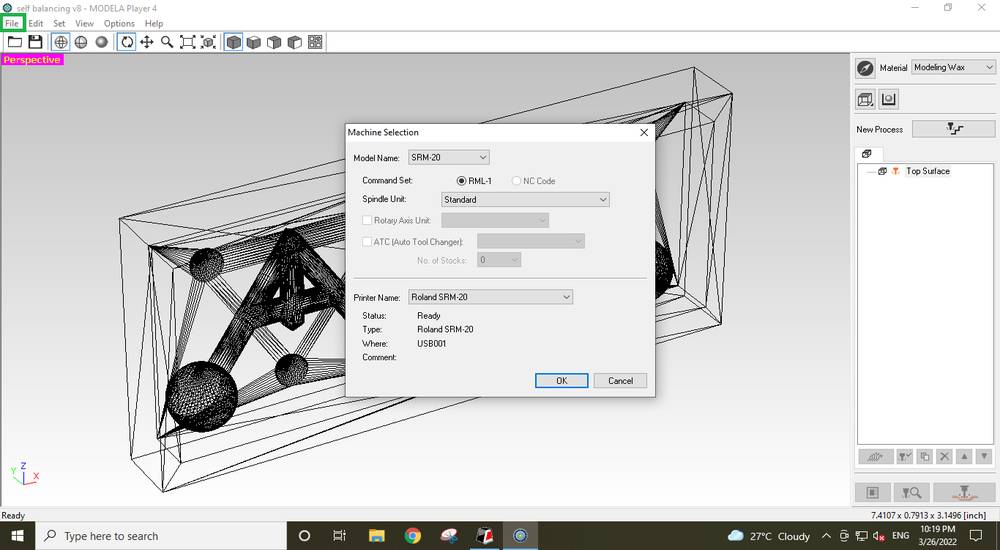
Go to File > Select machine and select "SRM-20" as Model name and select "Roland SRM-20" as printer name,
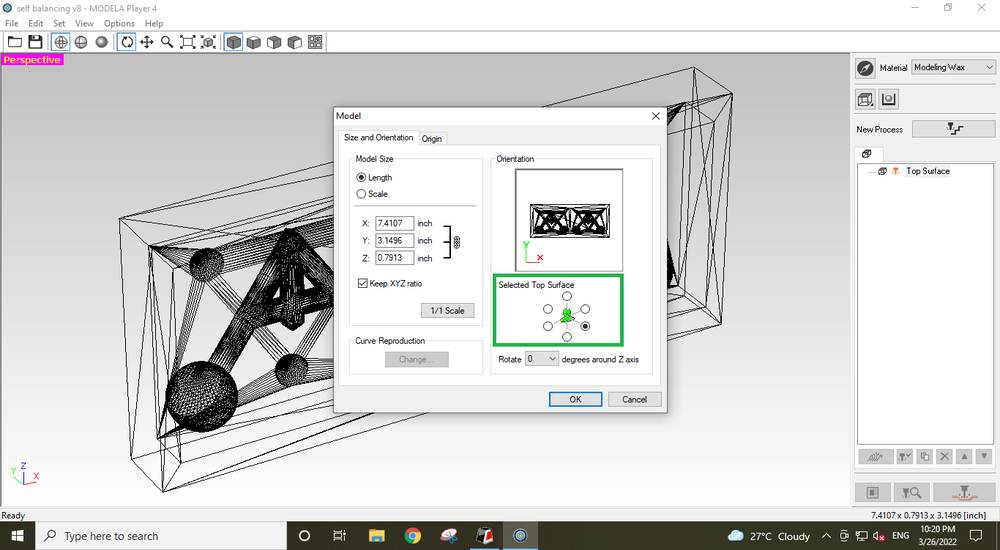
Go to Set > Model and under Size and Orientation tab, select the top surface. The orientation you select will be the orientstion in which the
machine will mill your mold. You
can see the overview of the top surface in the box under orientation
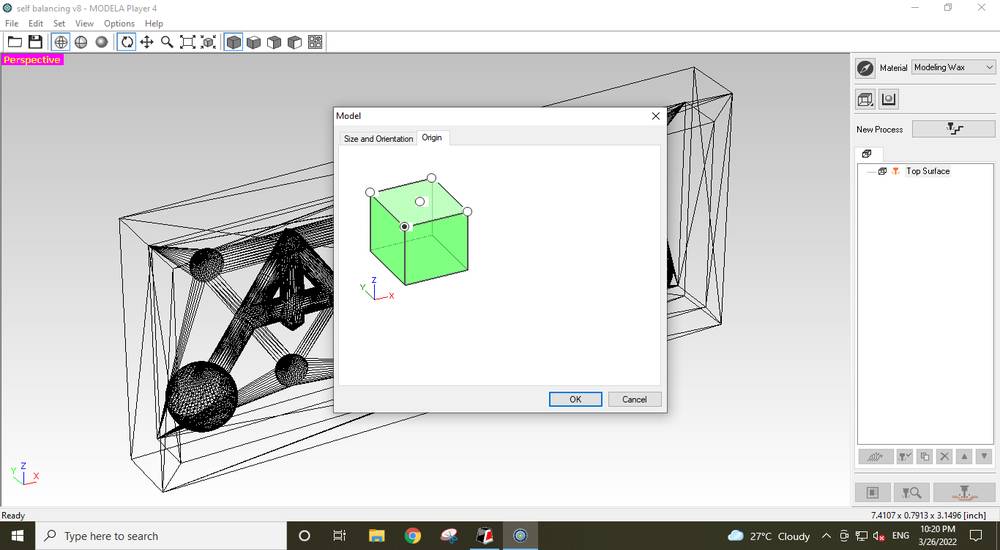
Under origin tab, select the bottom left corner,
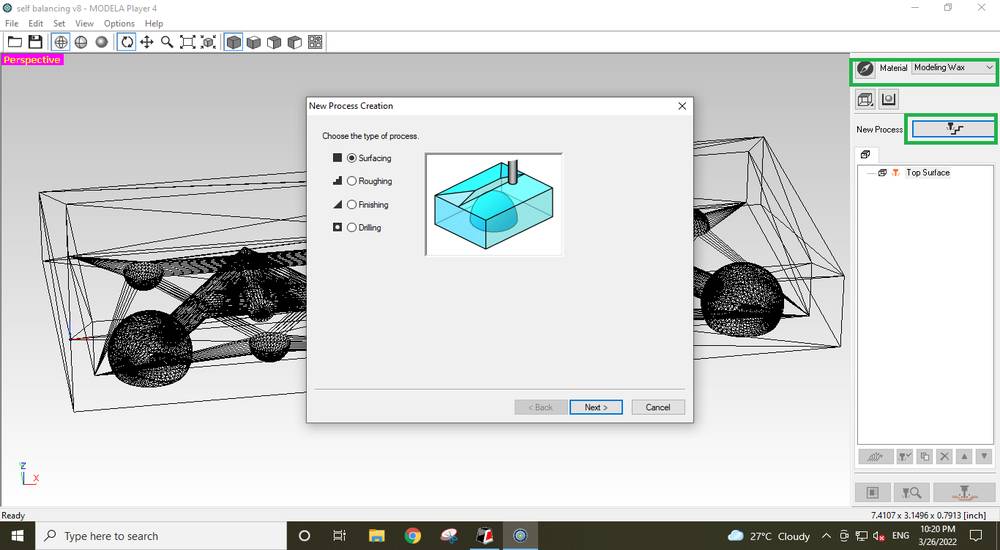
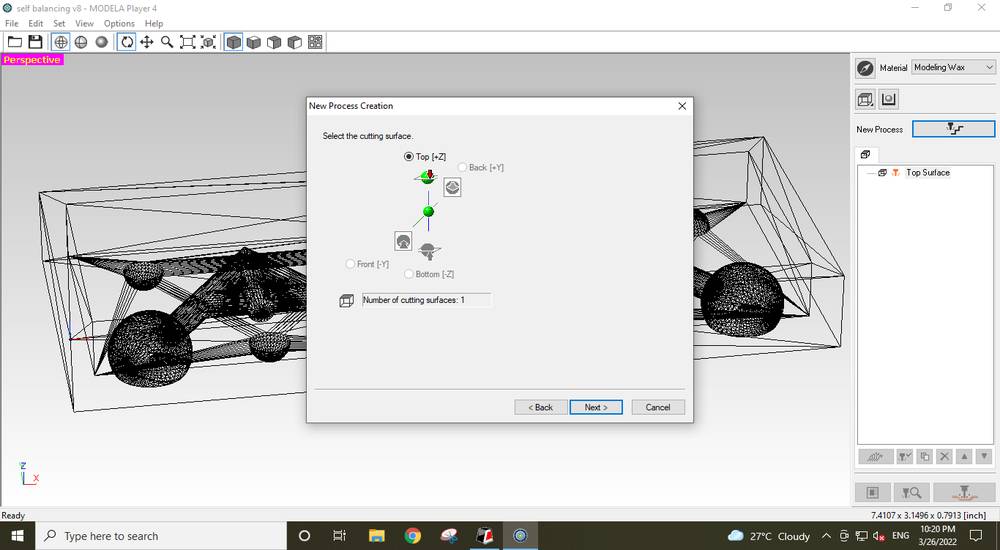
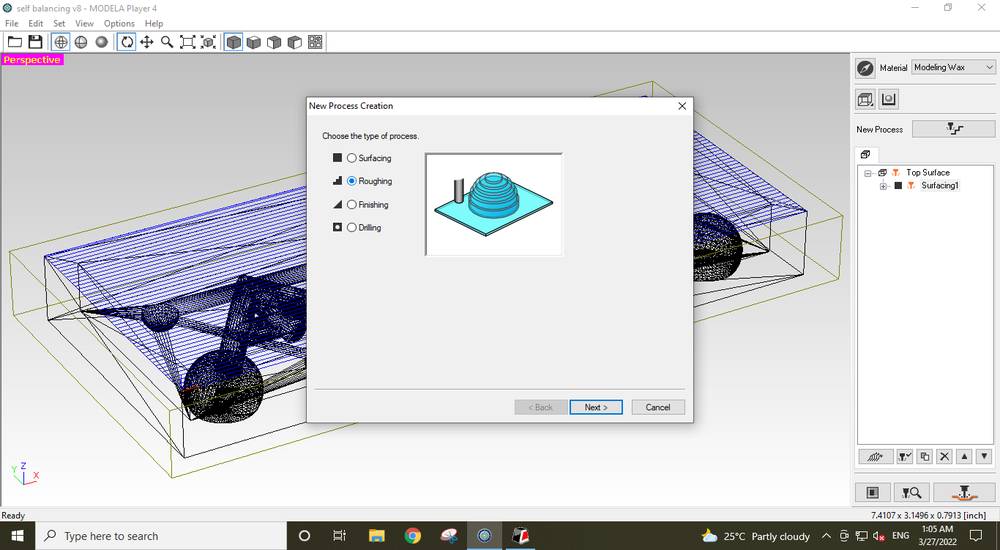
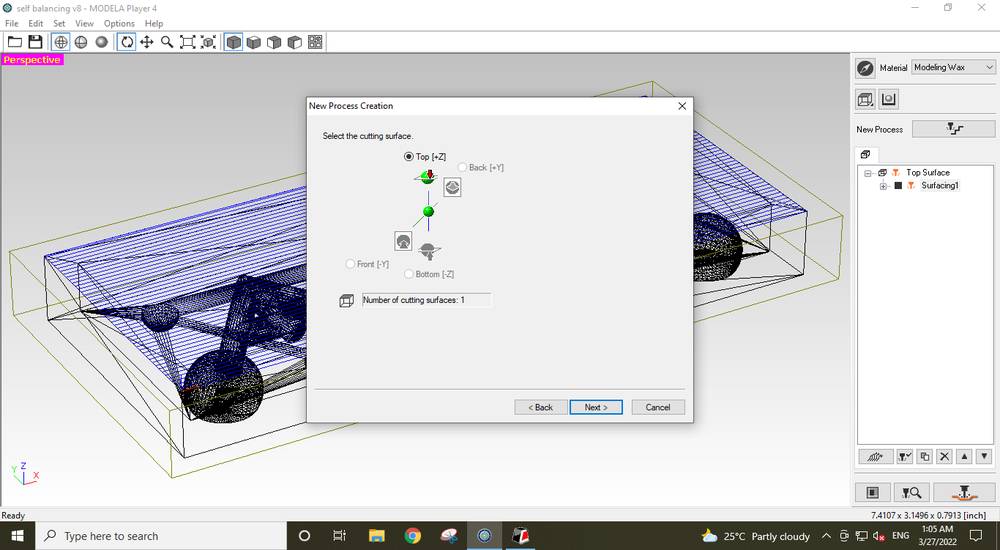
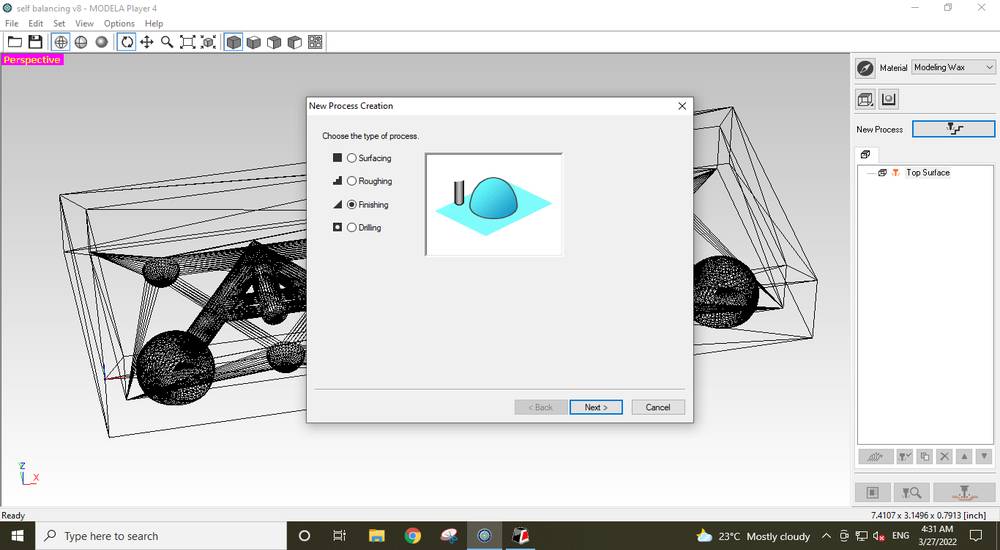
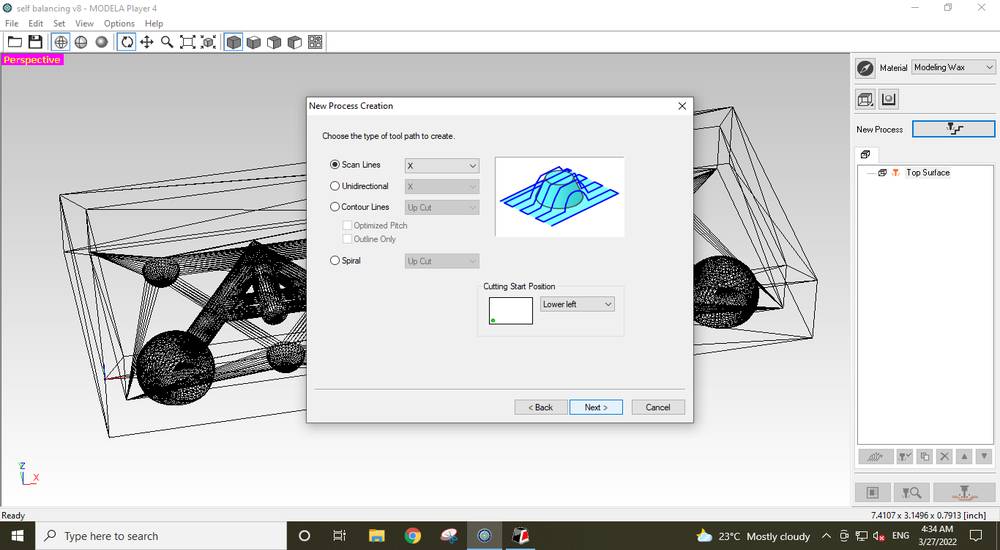
Since i was going to use machinable wax, i selected "Modeling Wax" for Material and then click on New process button. In the peocess menu,
i selected surfaccing,
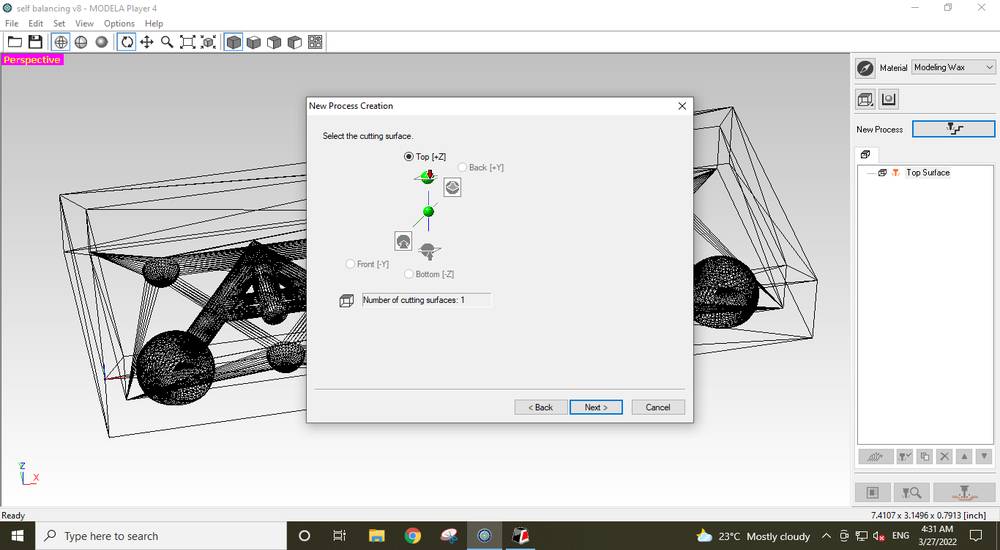
Kept Top[+z] as default and didn't change anything,
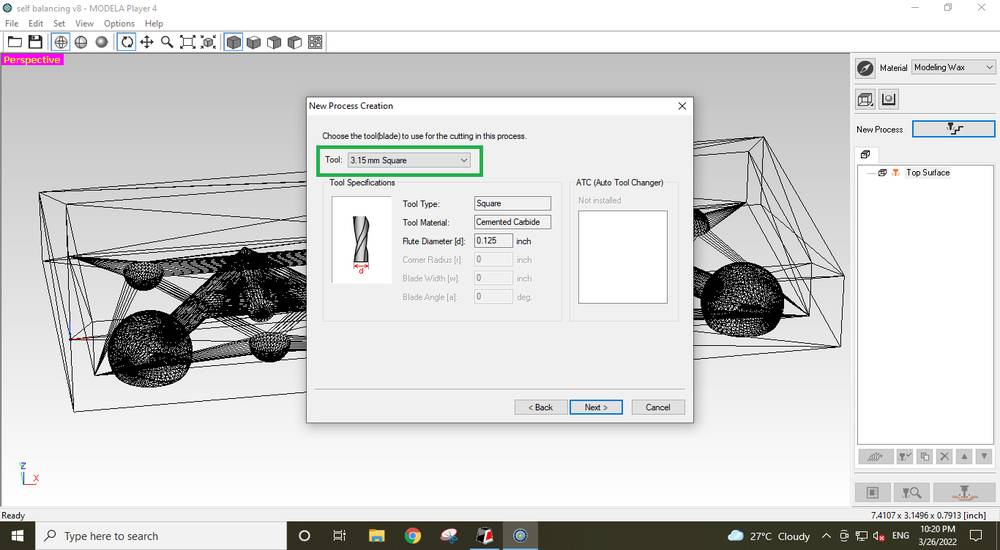
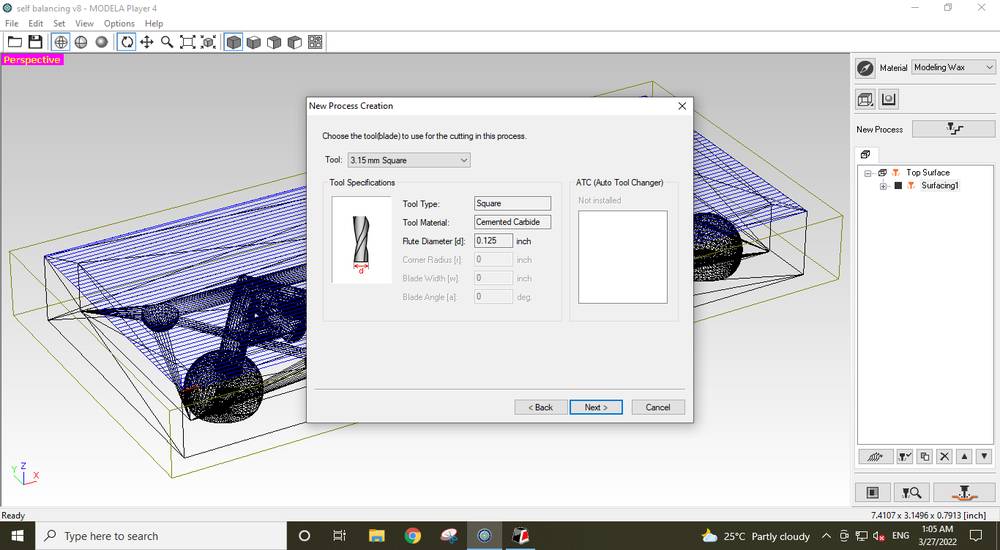
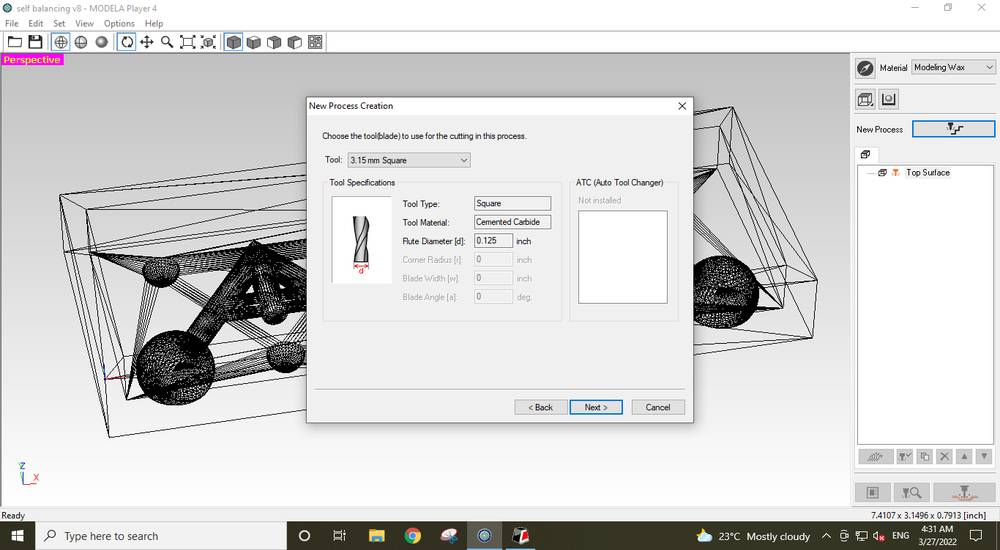
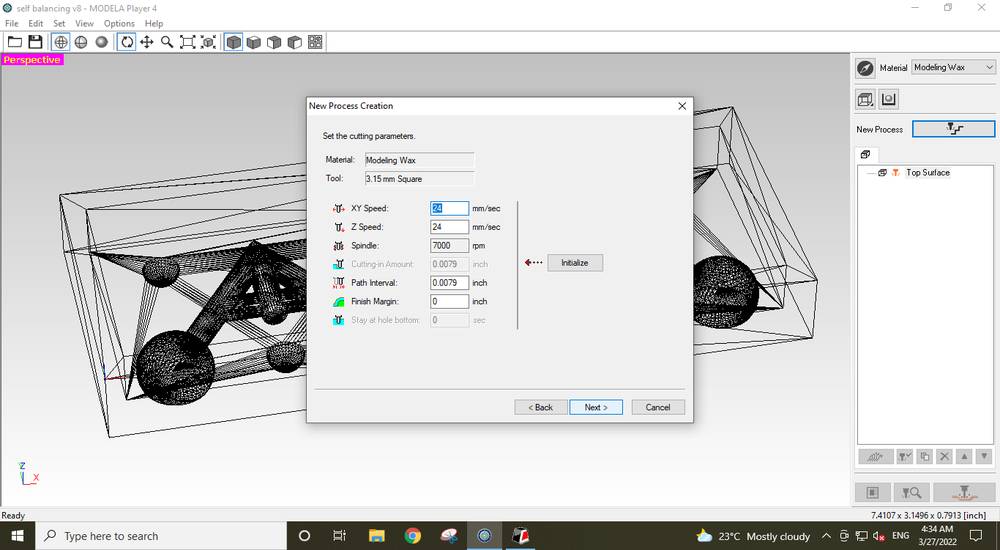
Select "3.15mm Square" as tool,
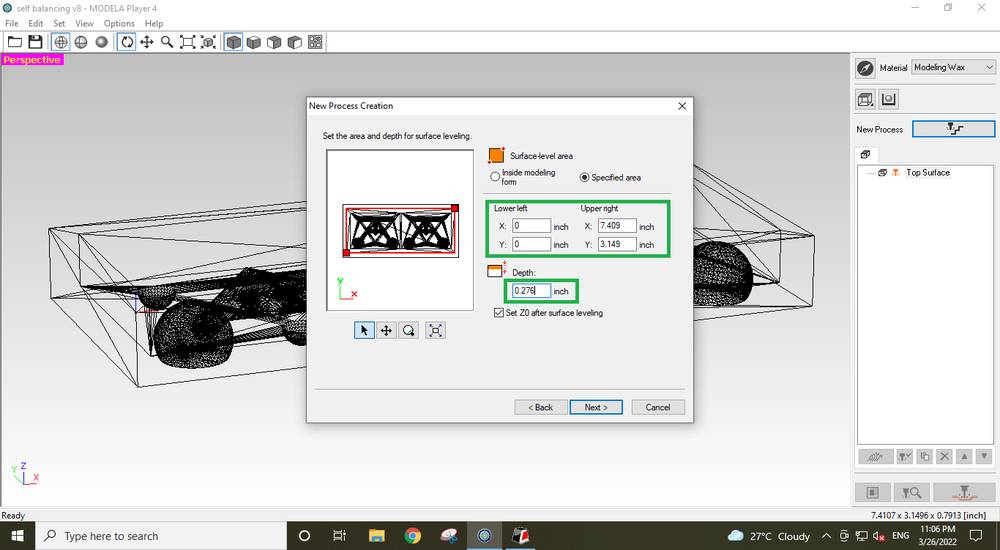
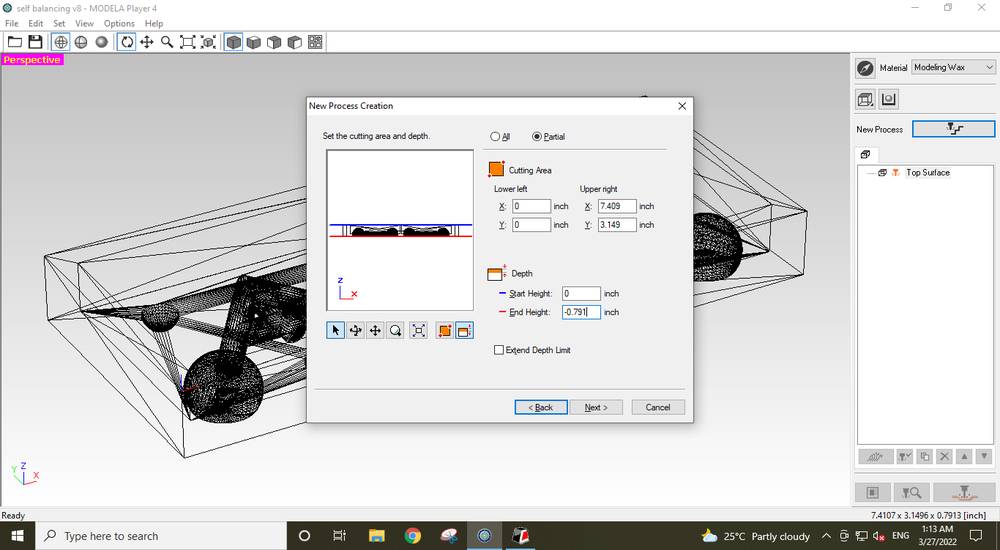
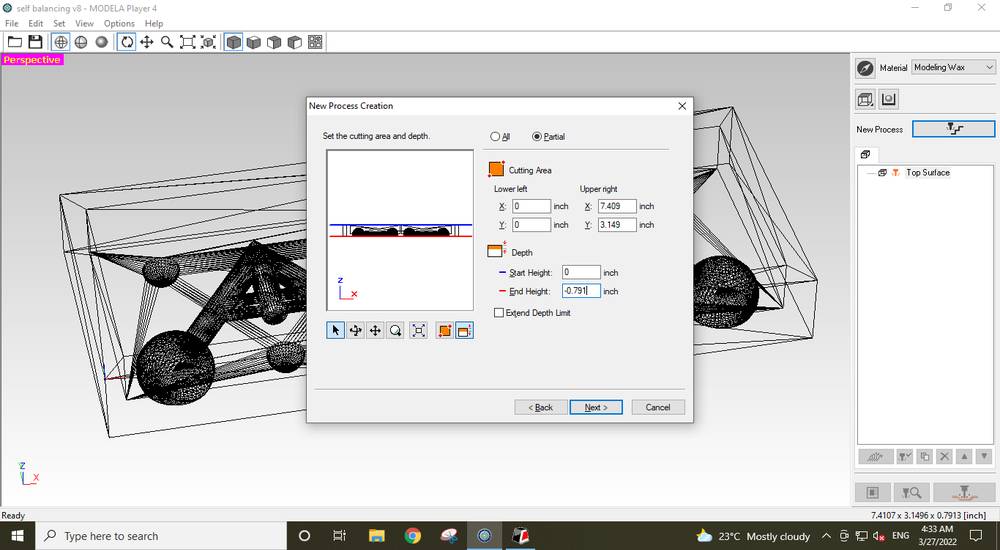
Under "Specified area" tab, depending on how uneven is the surface of your wax, select the depth cut. The dimension you enter there is the amount of inches that will be
removed from the top surface. Also tally the dimension mentioned: X and Y of the lower left should be 0 and X and Y of the upper right should
be the dimension of your mold,
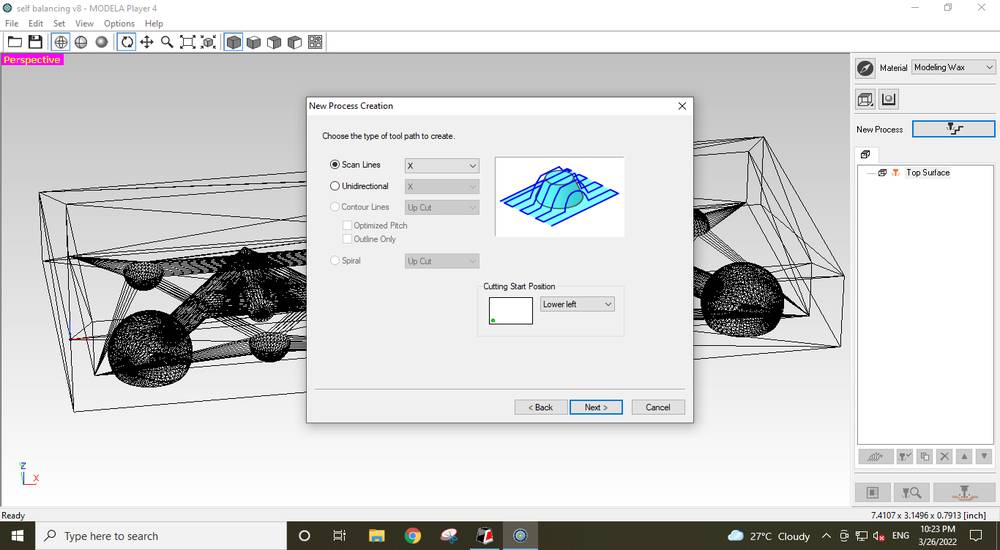
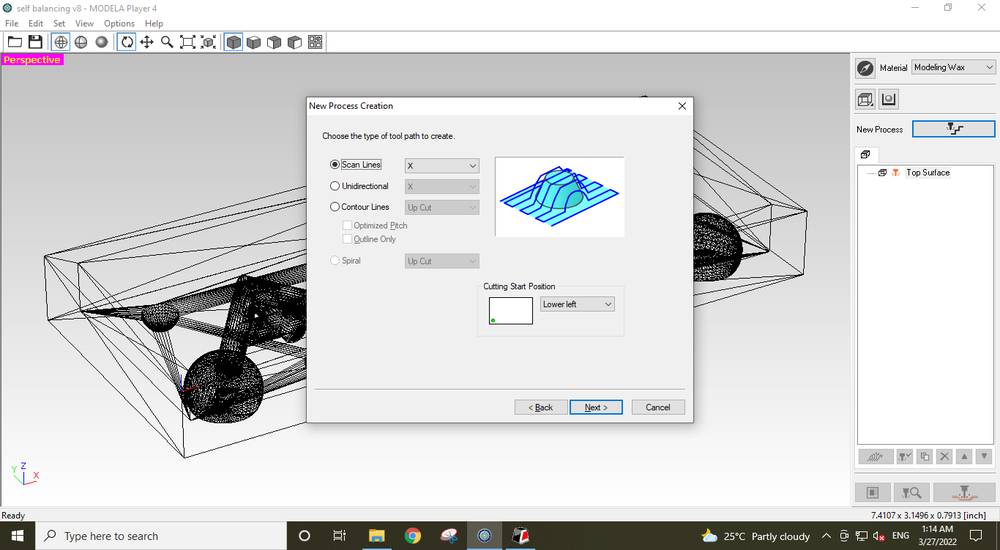
I kept the scale line as "X"
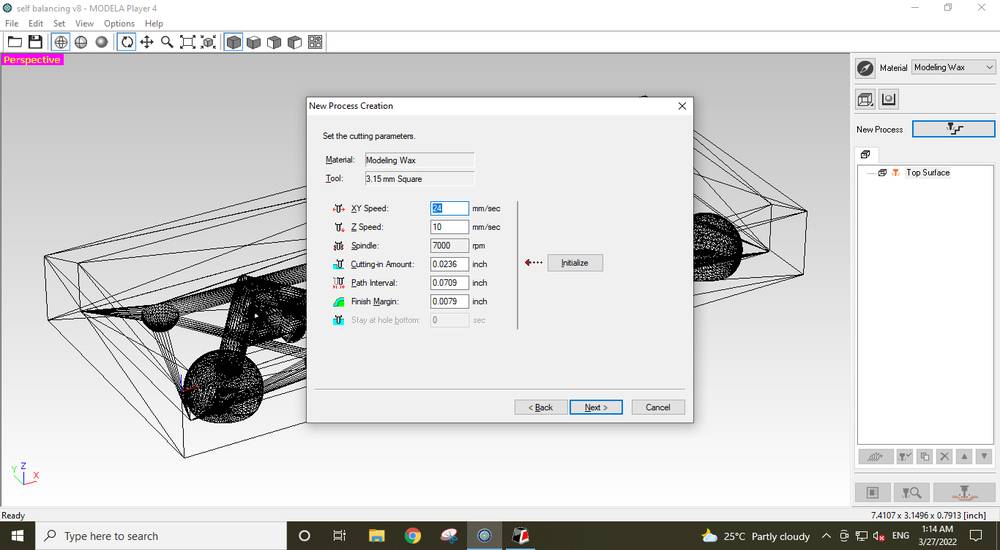
I then kept the settings as default for the Cutting Parameters,
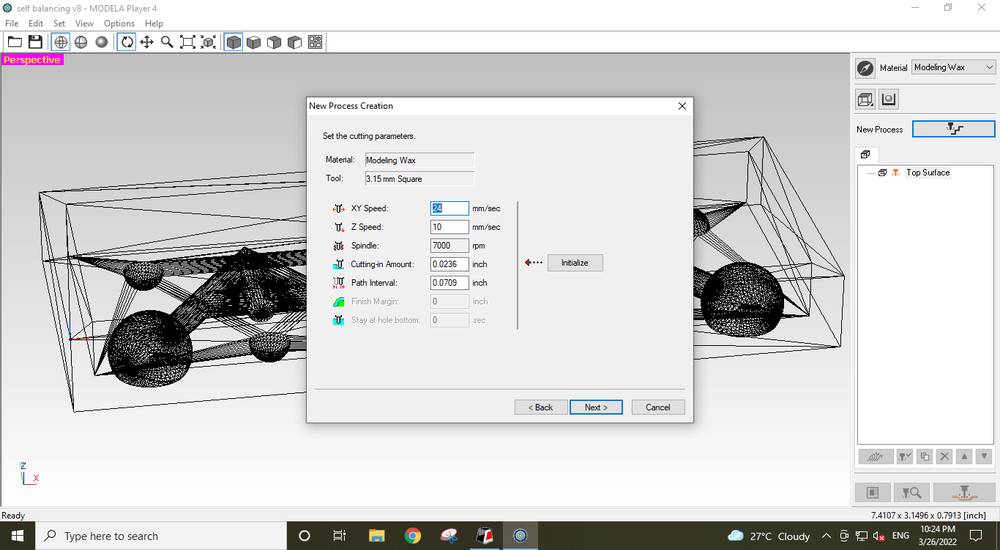
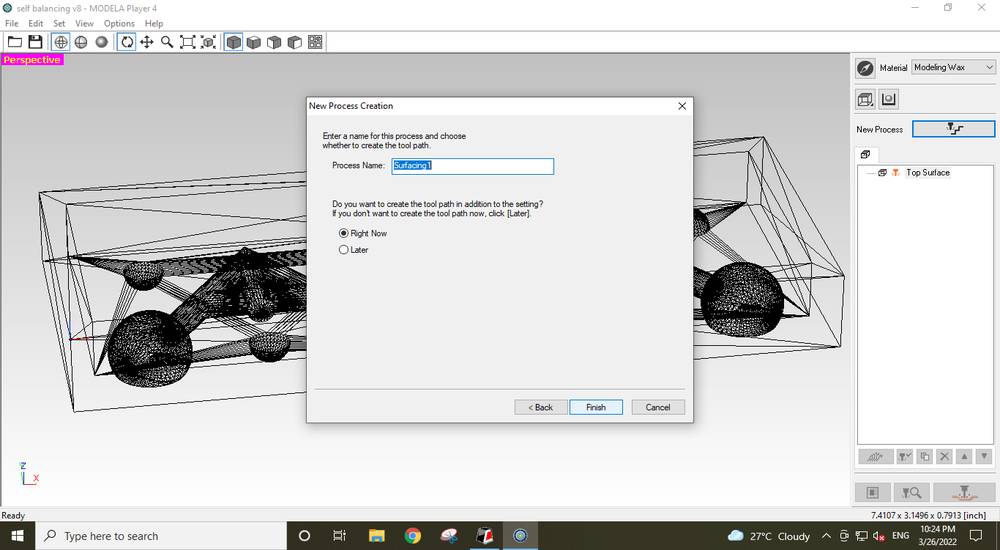
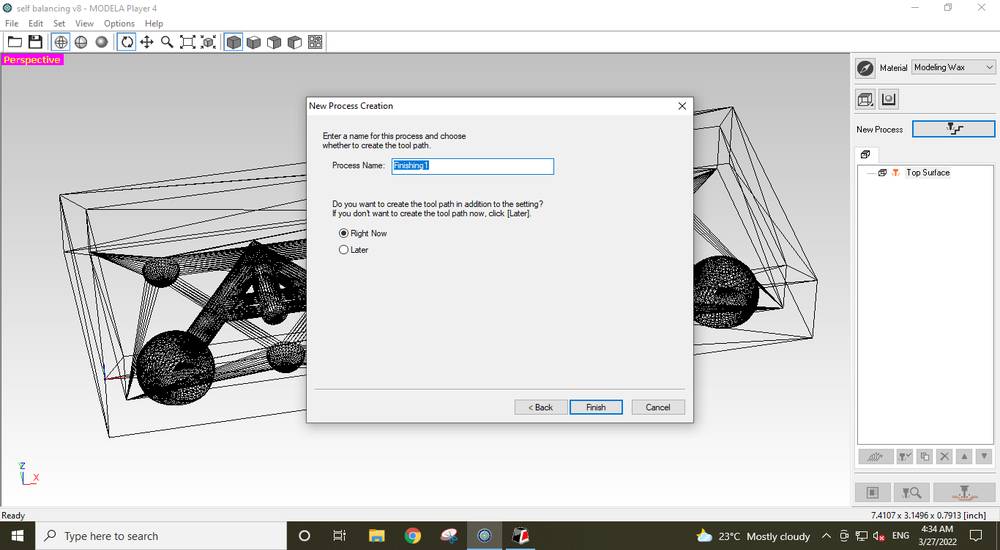
Select right now,
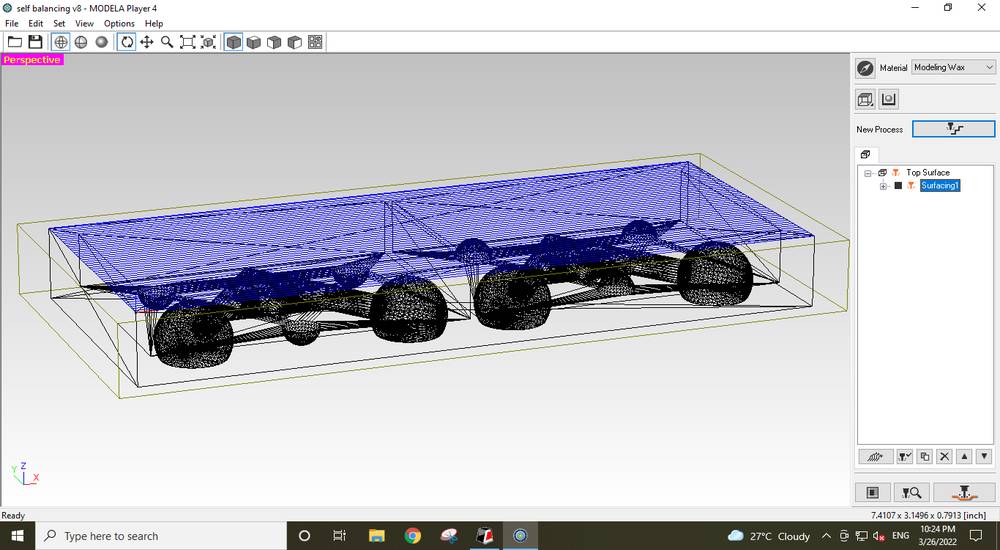
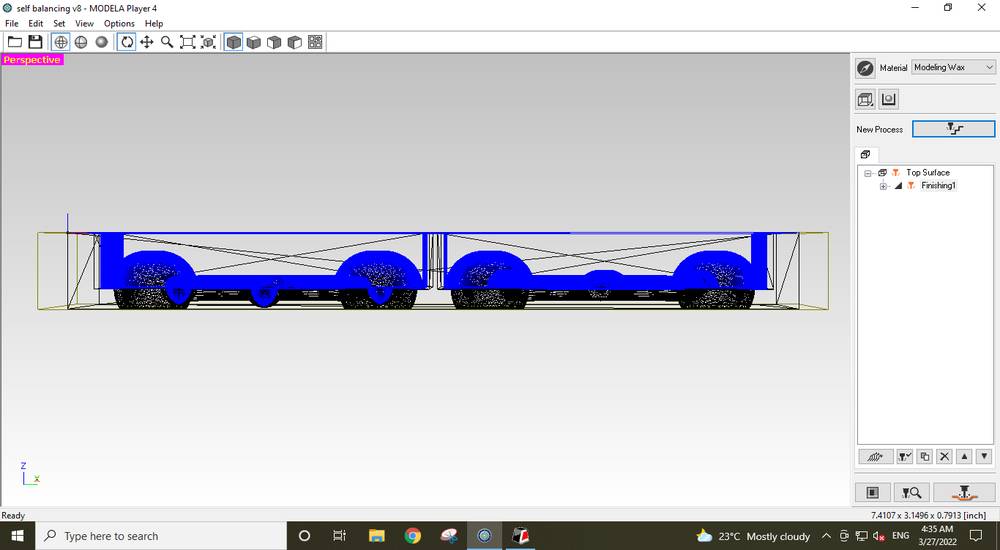
This was the overview of the surfacing,
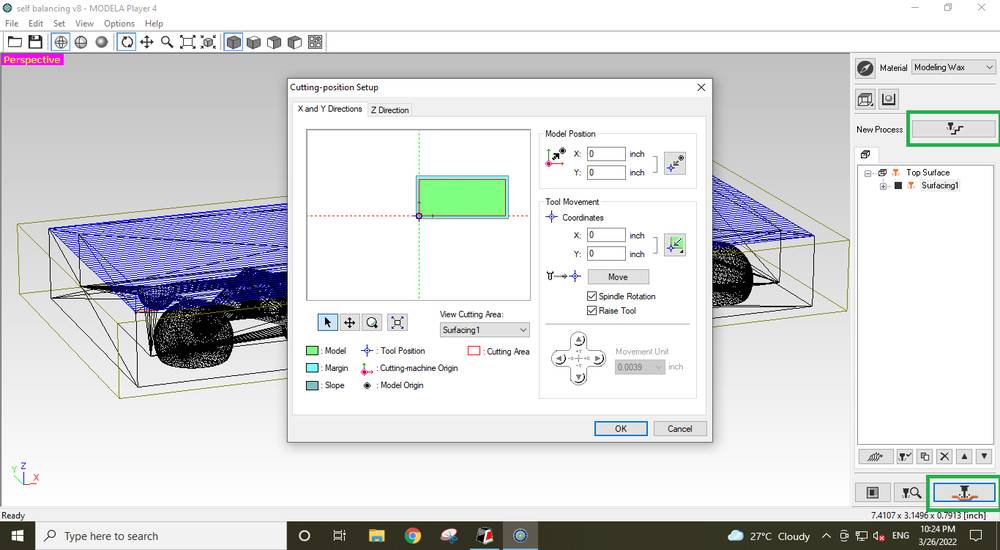
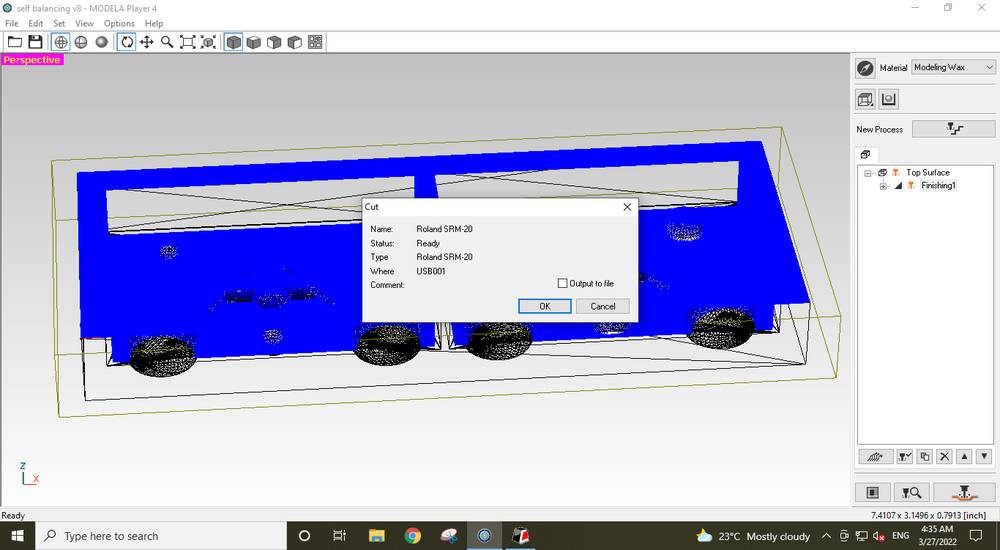
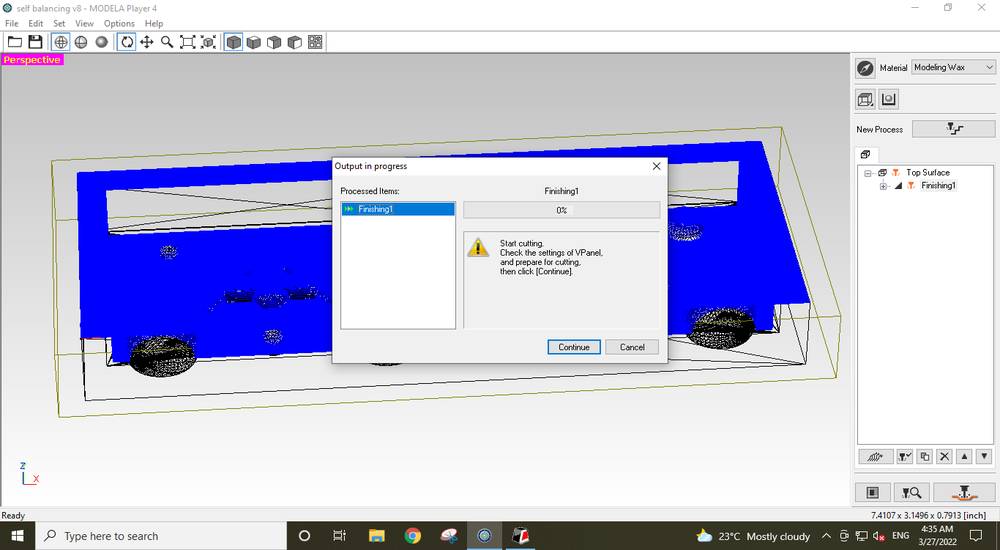
Click on the surfacing toolpath and then click on "Cutting" icon and kept all the settings in there as default and didn't changed anything,
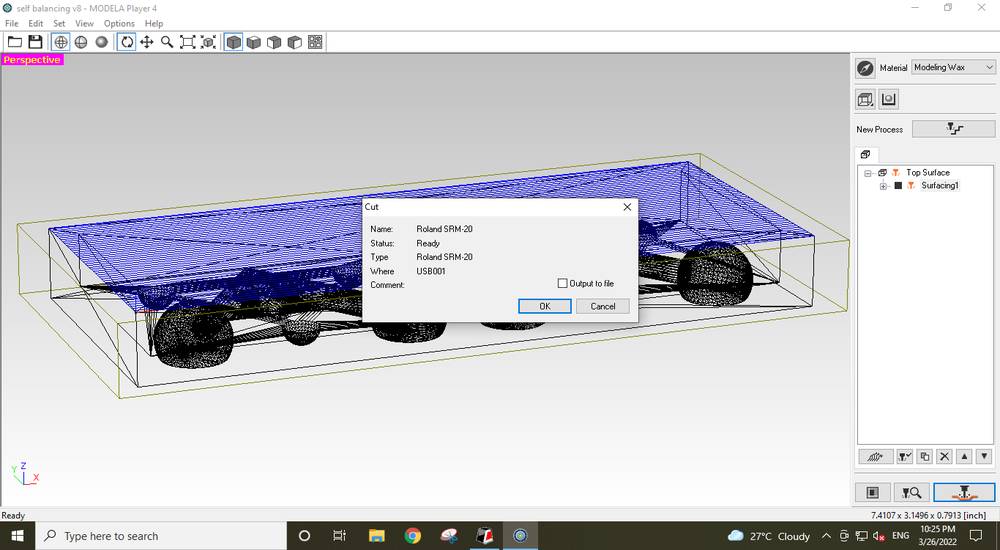
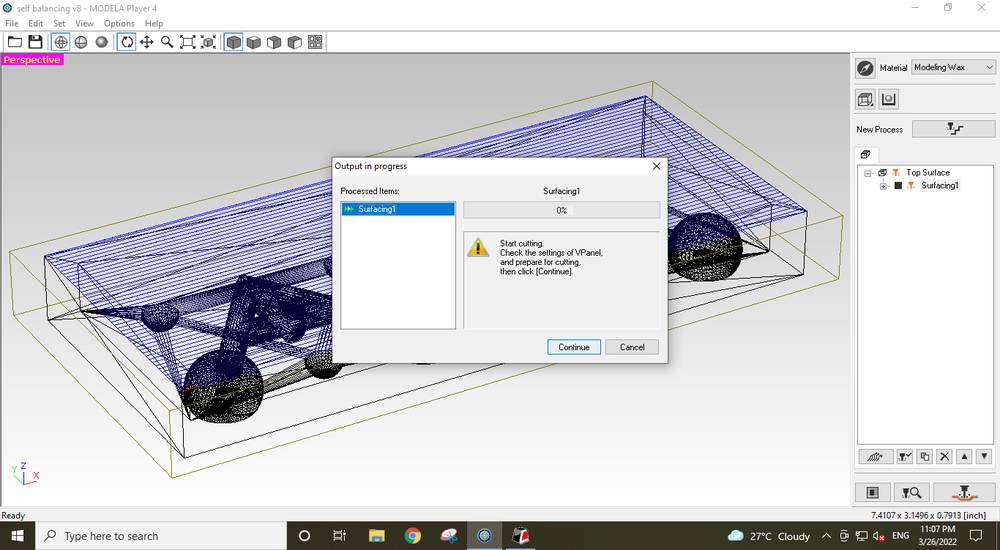
After clicking on the "continue" button milling machine will start to remove the layers from top surface for surfacing, so make sure
you have set the origin of XYZ axis from the Vpanel before clicking on the continue button
Problem faced while surfacing,
So my goal was to set the XYZ origin just once and then call the spindle to the XYZ origin before doing surface, rough and
finish cut. So considering the total depth of my mold, which was around 20mm i was going to insert the endmill into the collet in a way
that 25mm of the endmill sticks out of the spindle,
However, when i set the origin and started to cut for surfacing, i was getting an error where the LED onto the machine atarted to
blink. Here is the video showing that,
In the above video, after i set the origin, i moved the spindle up a little bit(on the Z axis) and then i started the milling process from the
generated toolpath.
How i solved the problem
One of colleague suggested to insert the endmill a little bit more inside the collet so that only 10-15mm of the endmill sticks out of the
collet. I tried doing that and again set the XYZ origin and then when i started the milling process from the generated toolpath, the machine started
to mill,
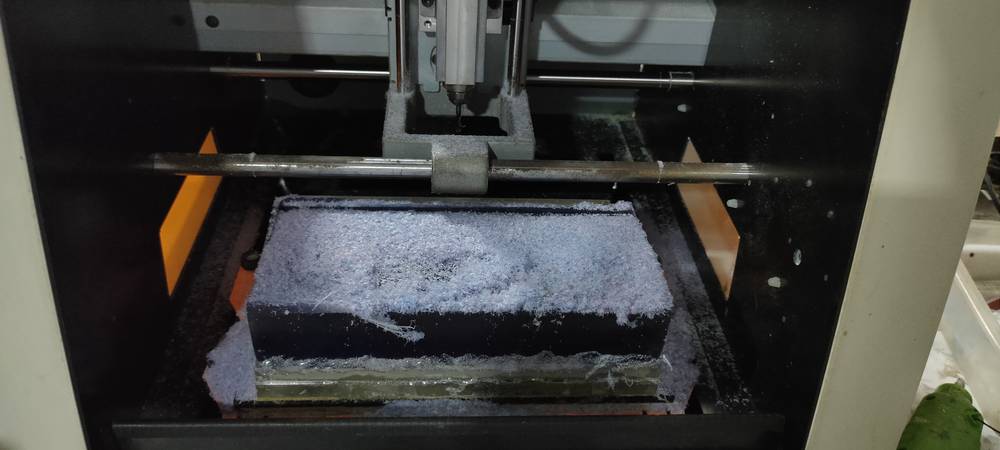
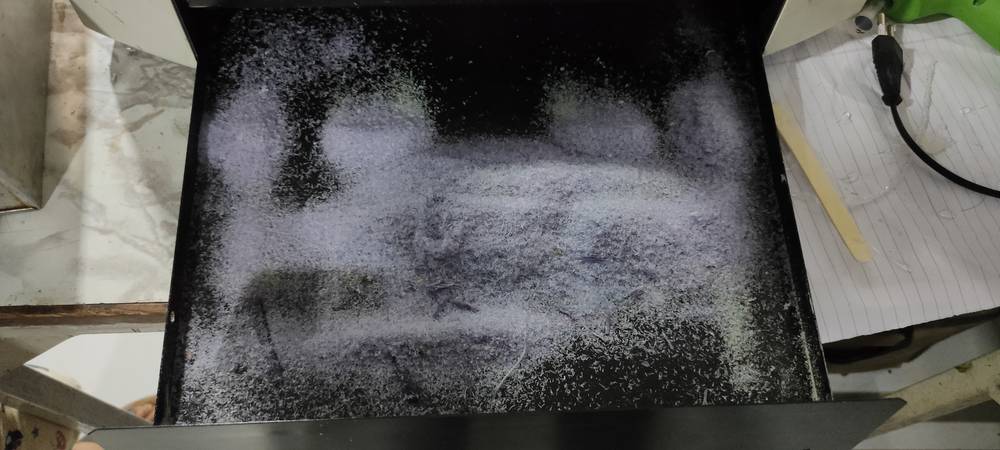
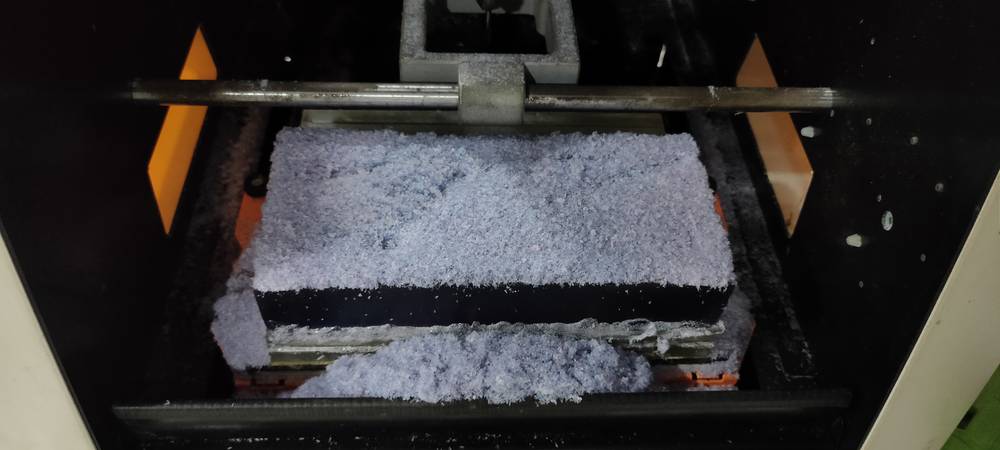
After the milling machine is done with the surfacing, collect all the debris of wax into the tray. You can melt them into new wax block and use
it again. This is how the wax block looked like after surfacing,
Roughing
For roughing, the procedure for generating the toolpath is same like surfacing, except i selected "Roughing" while generating the toolpath. Here
are all the steps for generating the toolpath for roughing,
tally the dimension of the end height, it should be the same as your mold's height
Preview of roughing,

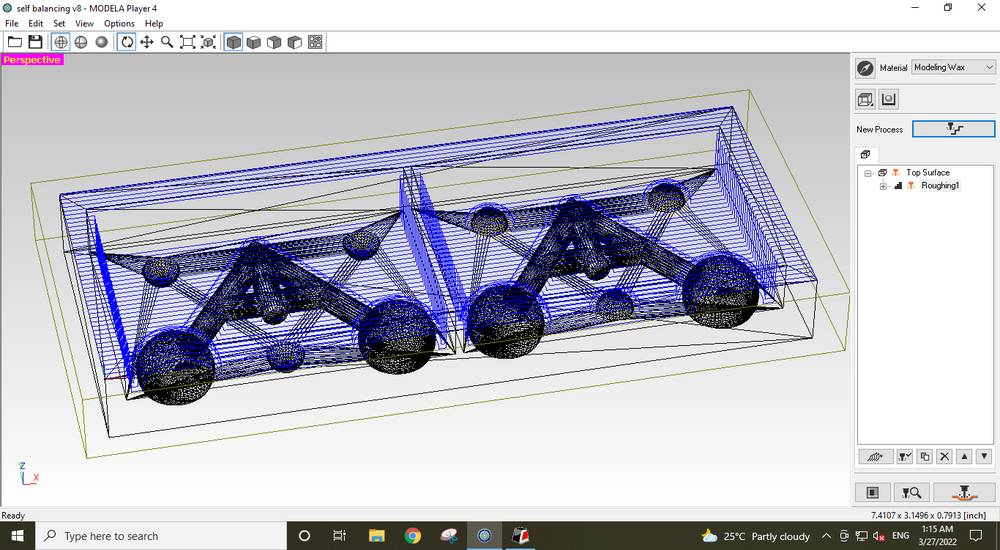
Here are the results after roughing was done,
Finishing
For finishing, the procedure for generating the toolpath is same like surfacing and roughing, except i selected "Finishing" while generating the
toolpath. Here are all the steps for generating the toolpath for finishing,

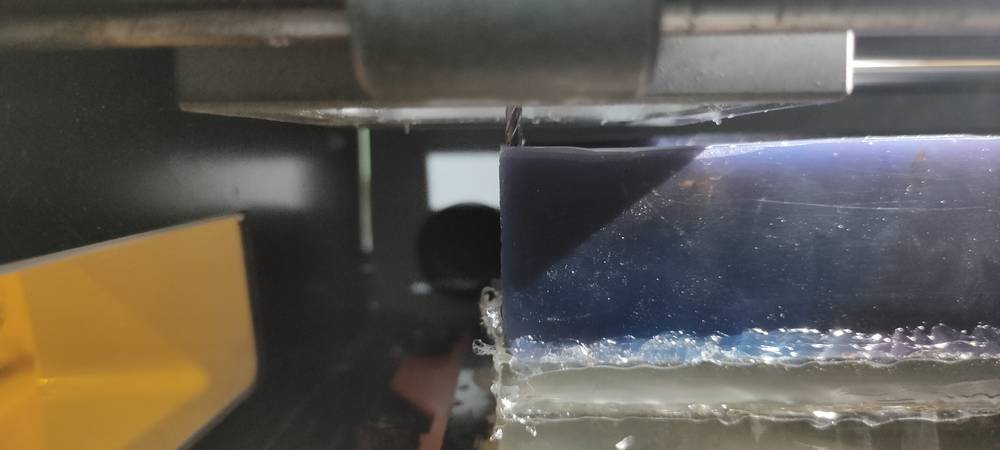
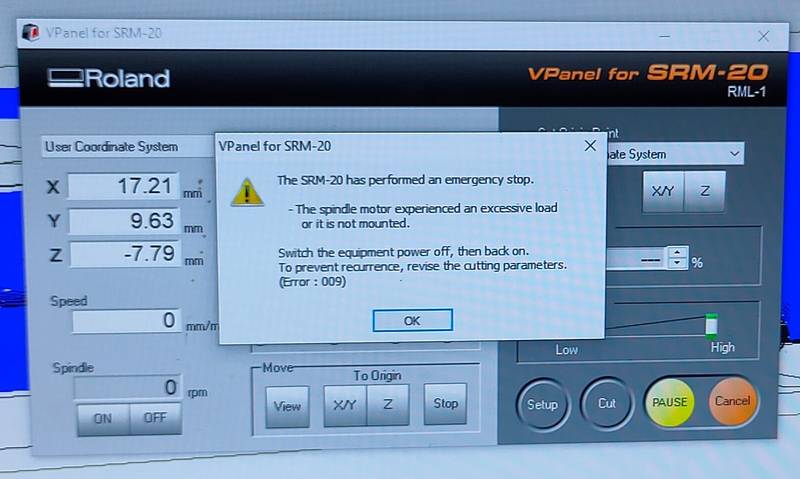
problem faced while finishing
After the milling process for finishing started it was milling fine for few minutes, but after a point, the spindle started milling deeper
and deeper until i got some error in PC(the one i mentioned above where the LED on the machine was blinking) and also the endmill got loose
from the collet,
and yes, i did tighten the screw of the collet properly with the endmill inside, while doing the gravity for Z axis.
I again set the origin and re-started the milling process. Once again, the machine was milling fine for the first few minutes and then after a
point, the spindle started milling deeper and depper until i got the error(mentoined above) and again the endmill got loose from the collet.
However, this time i managed to capture that while recording,
Because the endmill plunged deeper into the mold, the wax block slide an inch or two from one side of the plate. I managed to slide it back to
it's place and again used hot glue to stick it but there has to be some offset becasue it can't be possible that i placed the wax block
exactly on the same place.
how i solved the problem
The only thing i remember is that my colleague, Kiran Wakchaure, did something with re-setting the origin. He first called the spindle at its
origin and then he slide the spindle to the left a bit, making offset in the X axis and then set that position as the new origin. The offset was
very minimal. And then i again started the milling process and this time the machine didn't plunge the endmill deeper.
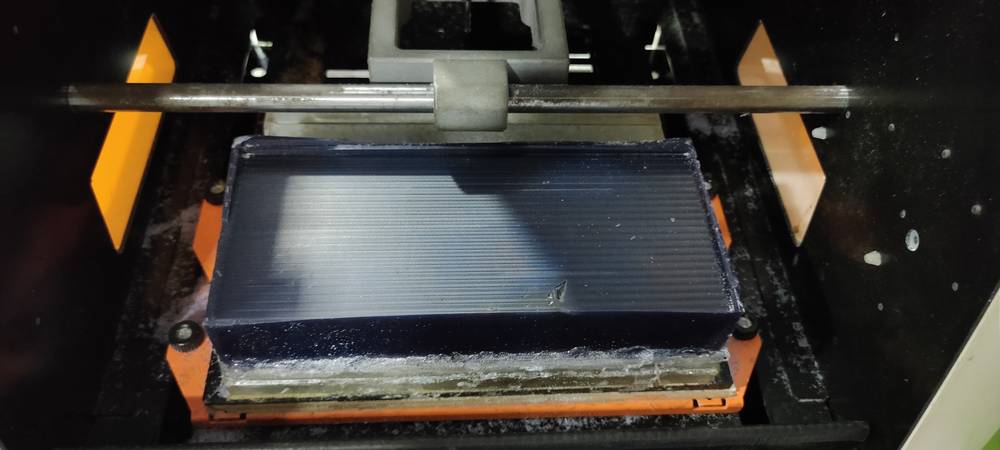
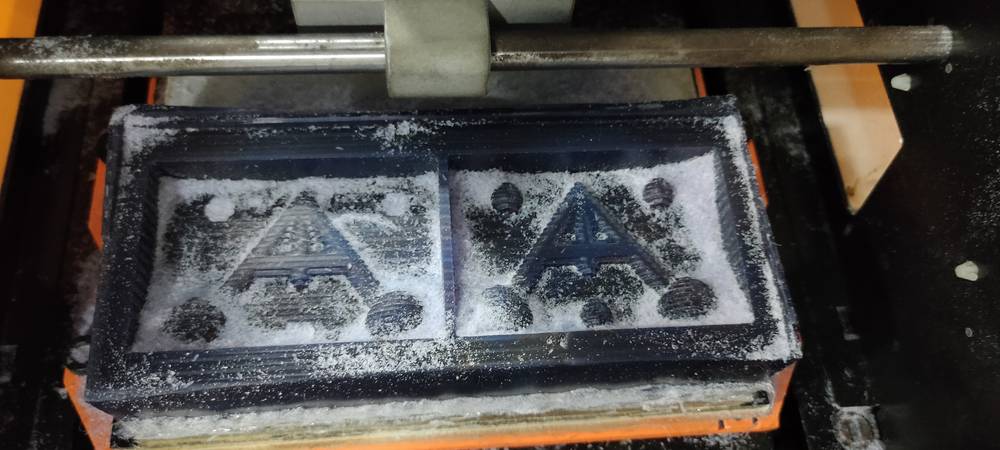
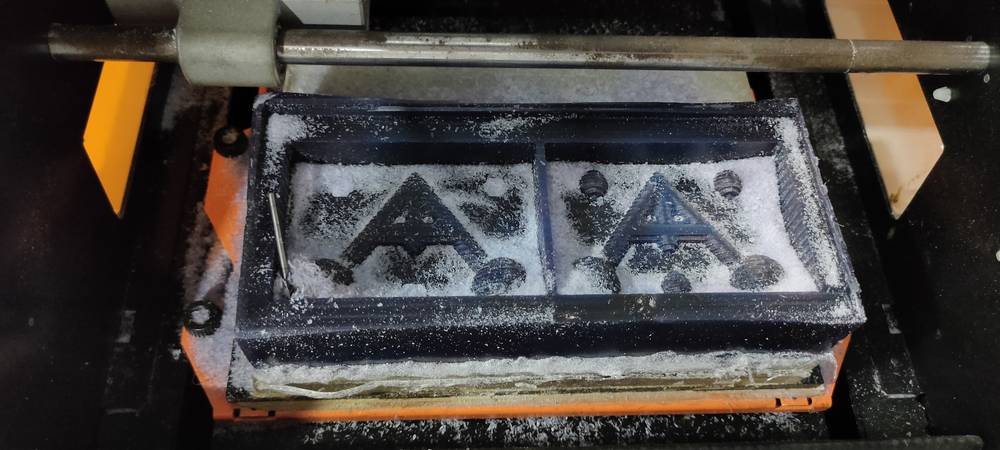
This is how the mold looked like after the finishing was complete,
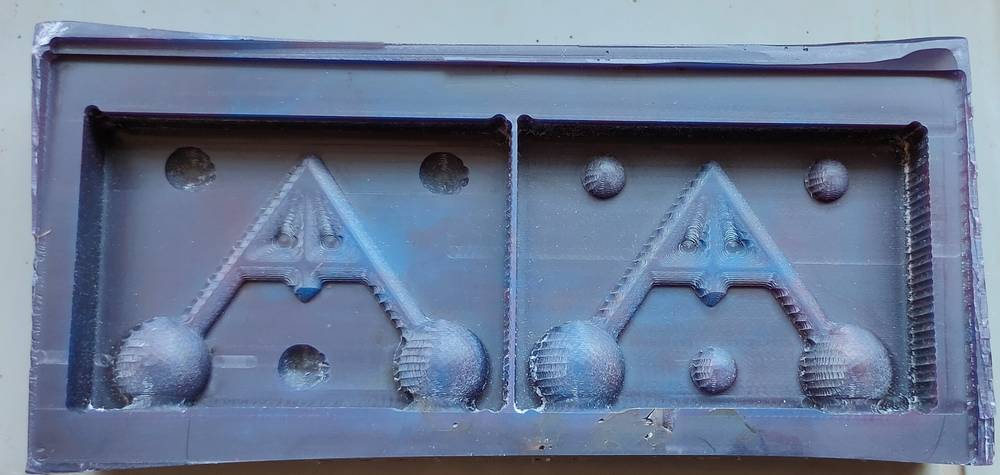
It took me 12 hours to surface, rough and finish cut the mold, supervising the machine most of the time.
And yet the mold that came out had smooth finish on some places and rough finish on some places. I don't know whether it was because the wax
block slide
on it's place or did i made some mistake in generating the toolpath or was the machine malfunctioning?
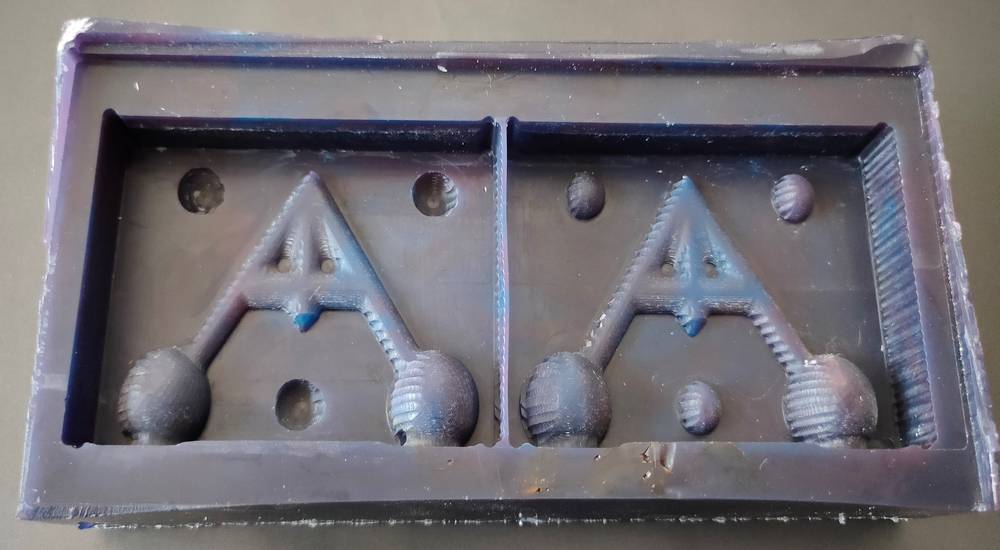
Making the negative mold
After the mold was ready on the wax, it was time to make the negative mold. I used silicon rubber to make the negative mold. We had this silicon
rubber cast in our lab,
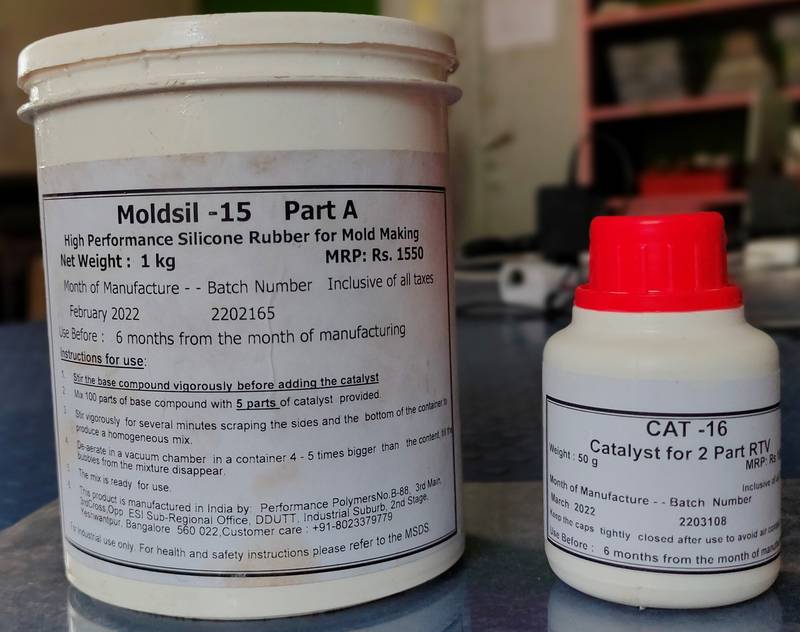
There is a base compound and catalyst and you have to mix it in 100:5 ratio, 100 parts of base compound and 5 parts of catalyst. To know how much
silicon rubber would require to make the negative mold, i pour water in one side of the wax mold and measured the weight of the water. The measurement
came out as 70 grams for one side. So i tentatively considered that i would need 80 grams of silicon rubber for one side of the mold. If the
measurement turned out to be wrong, i would have compensated while making the silicon rubber for the other side of the mold. With that
i had to mix 76 grams of base compound with 4 grams of catalyst.
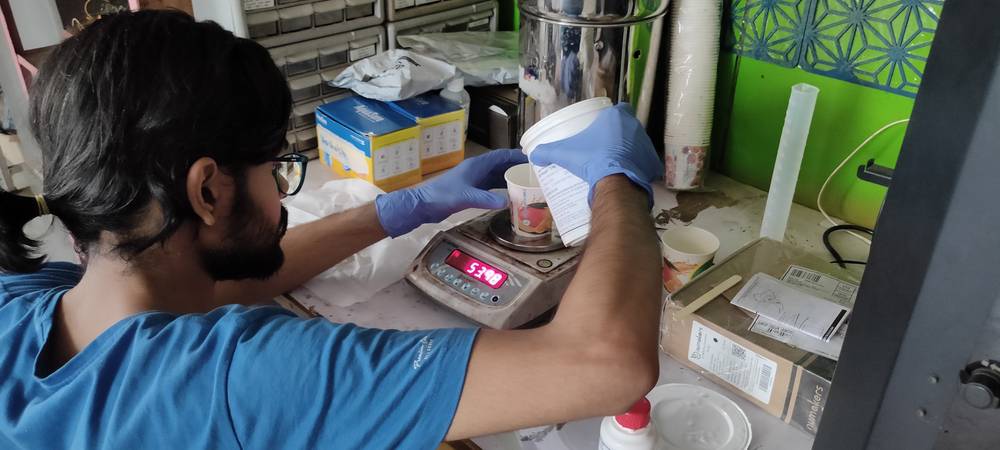
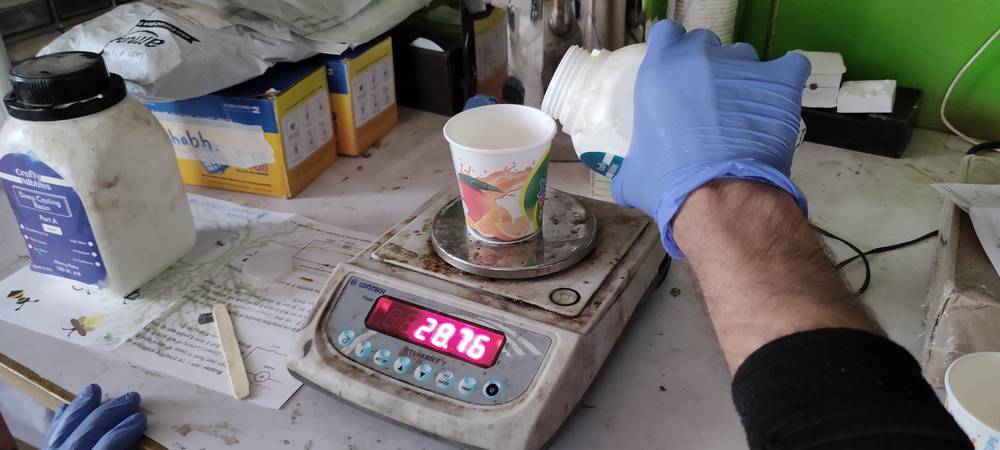
In the below photos, you'll see that i am taking 3-3.5 grams extra when taking the base compound and catalyst. The reason is that the weight
of the cup was 3-3.5 grams and i was not able to set the weight measurement of the weighing machine to 0 after putting the empty cup.
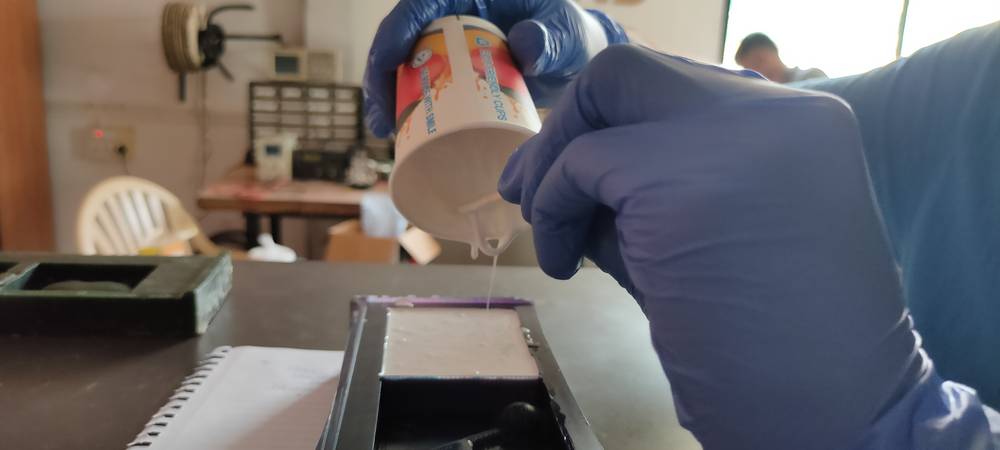
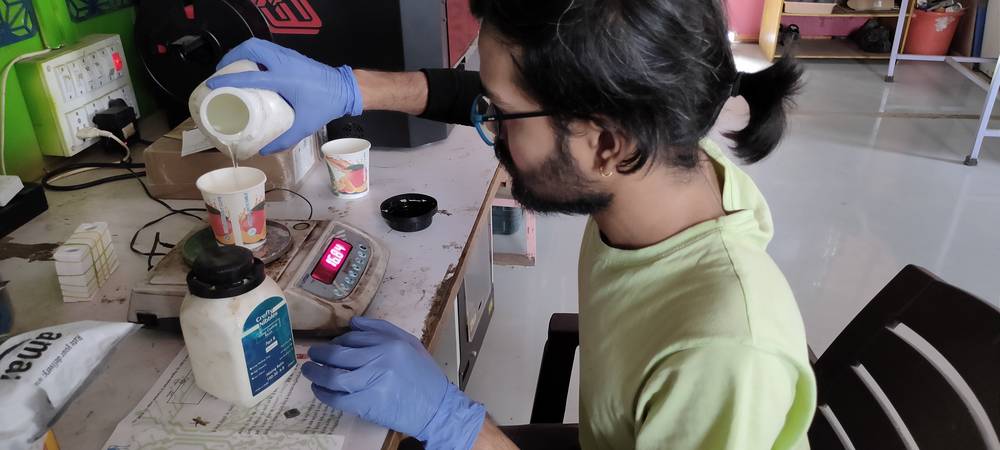
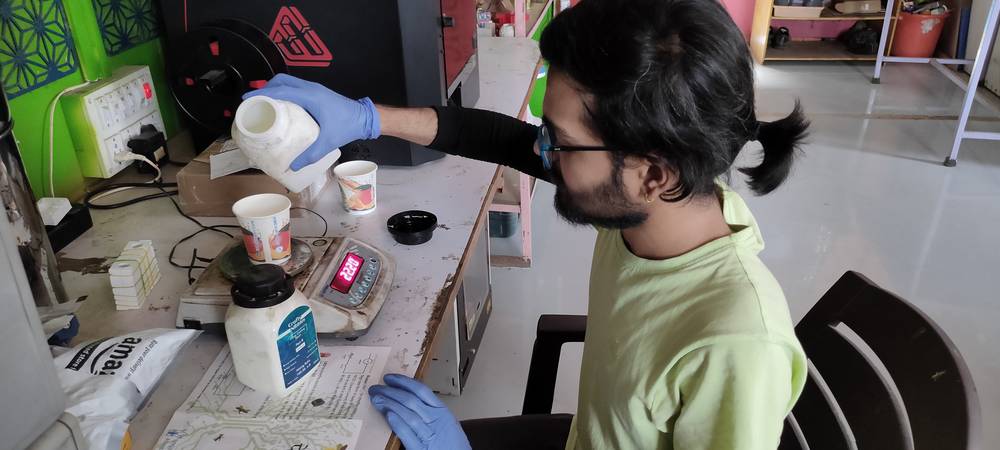
I first poured the base compound: 76 grams (76 grams + 3 grams of empty cup),
then i poured the catalyst: 4 grams,
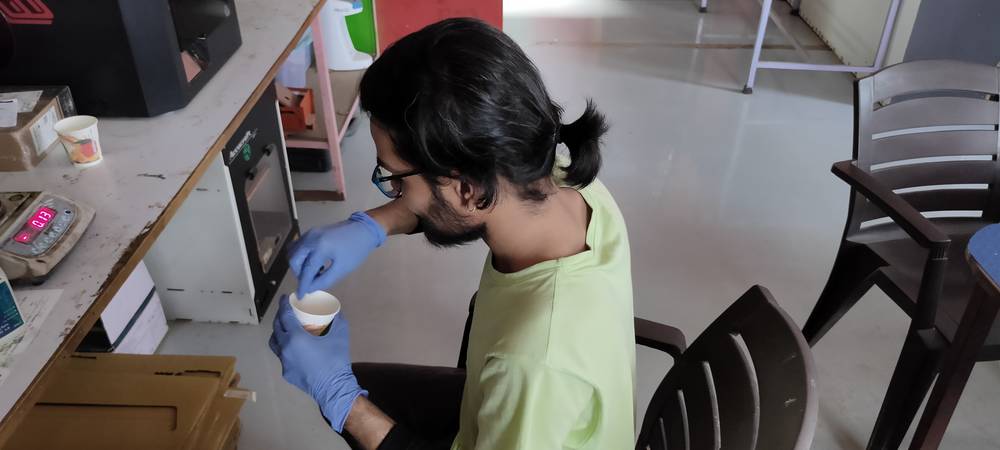
I then stirred the mixture for a couple minutes,
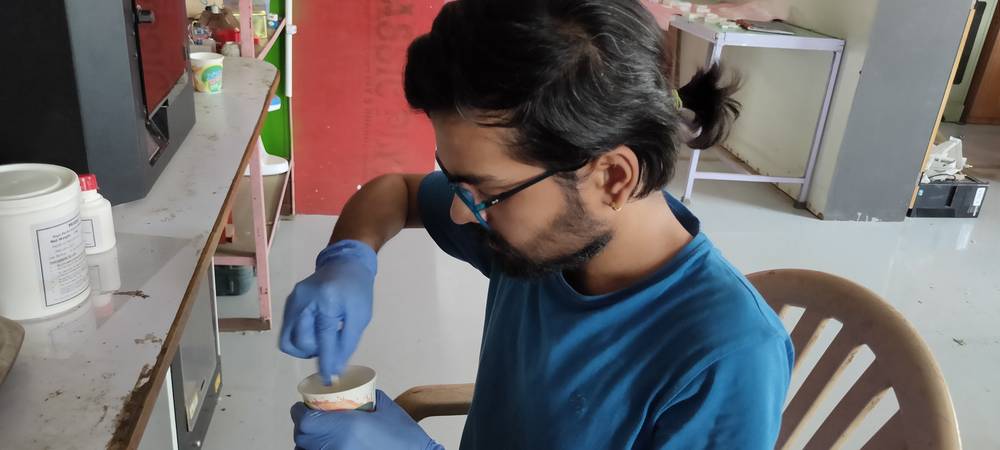
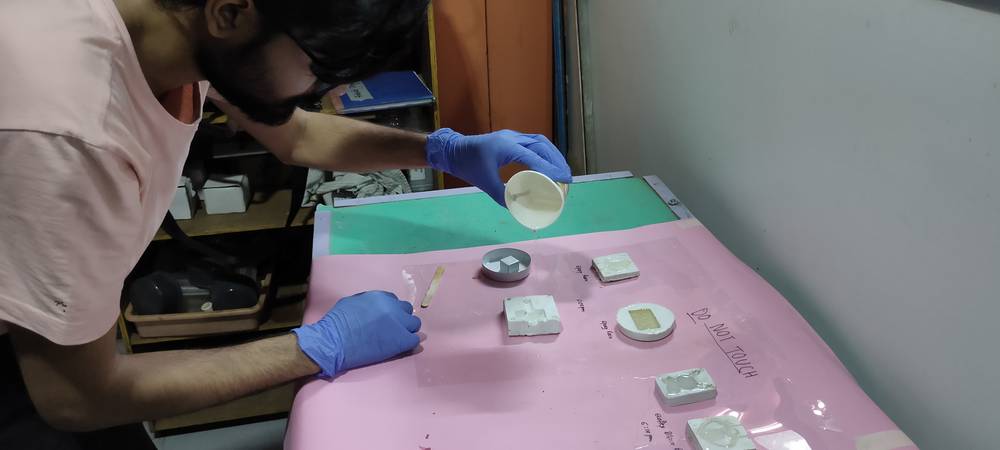
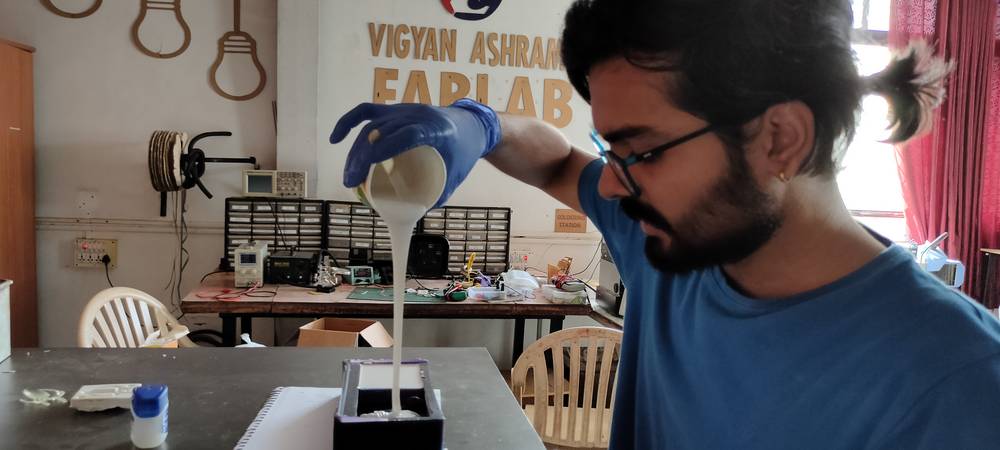
after the silicon rubber was ready, it was time to pour it into one side of the wax mold. My colleague suggested to apply petroleum jelly inside the
wax mold so that i can easily remove the silicon rubber once it is cured,

As you can see in the last image above, the the mixture turned out to be sufficient. Few more grams of mixture wouldn't have wasted, however i
decided to make another mixtre with the same measurements for the other side of the wax mold
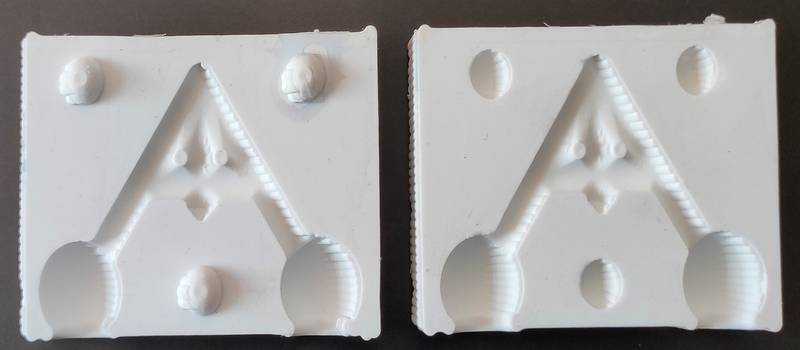
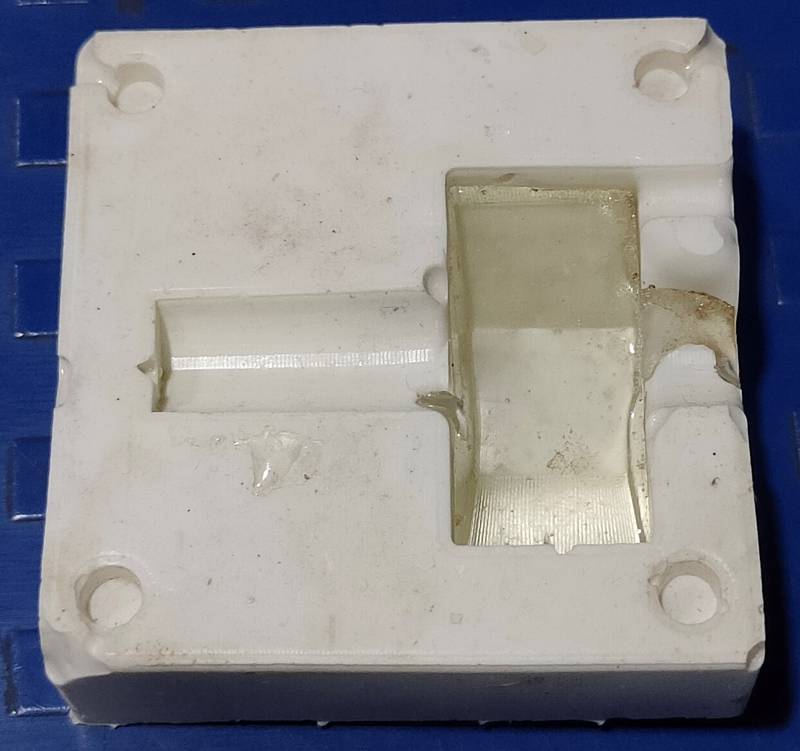
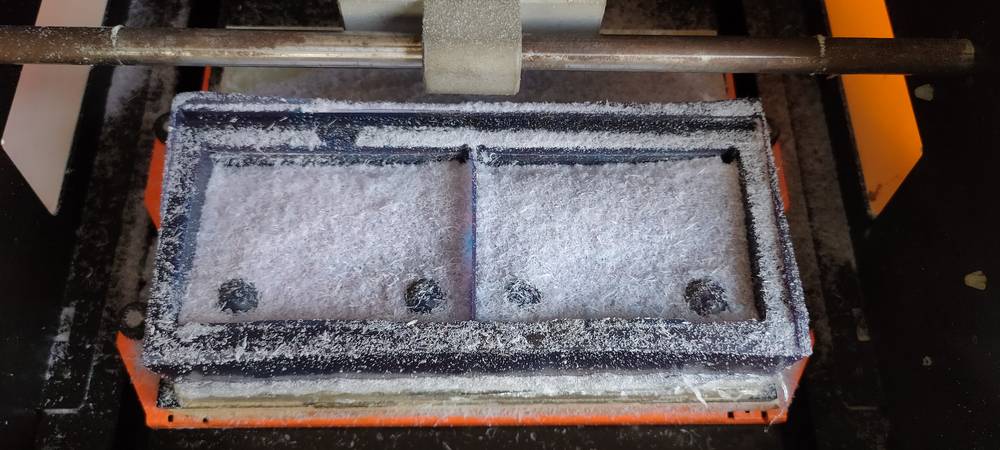
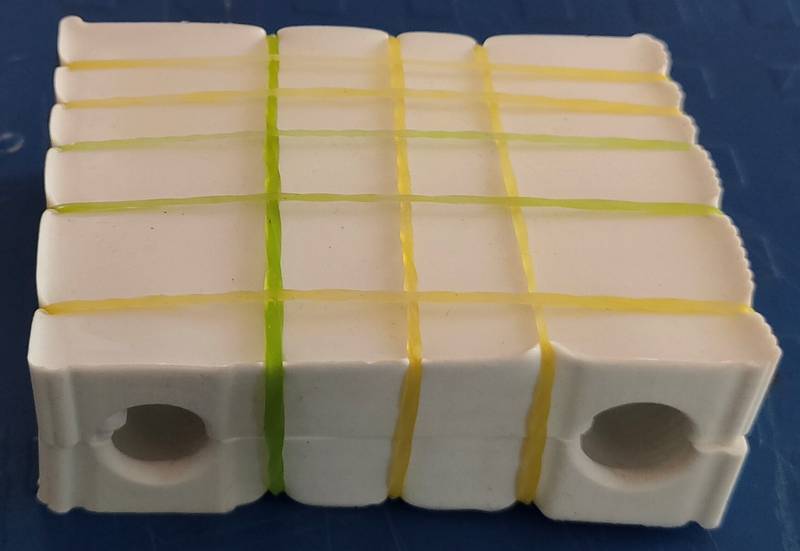
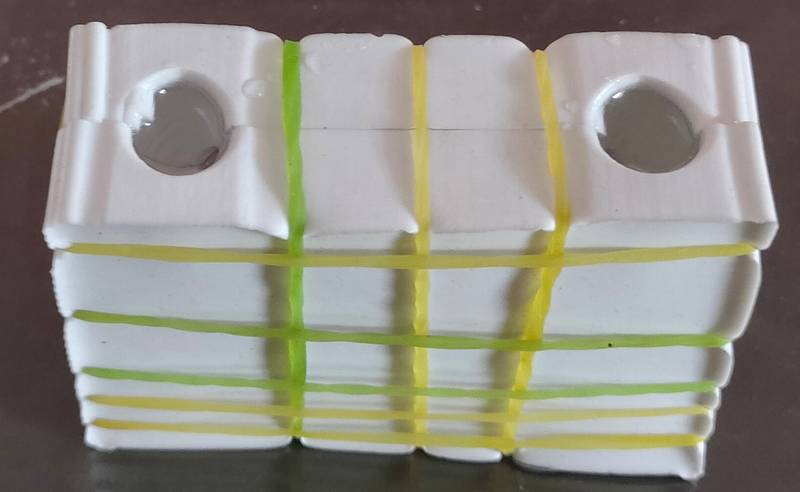
I set the mold aside and let it cure for 24 hours. Here is how the negative mold turned out,
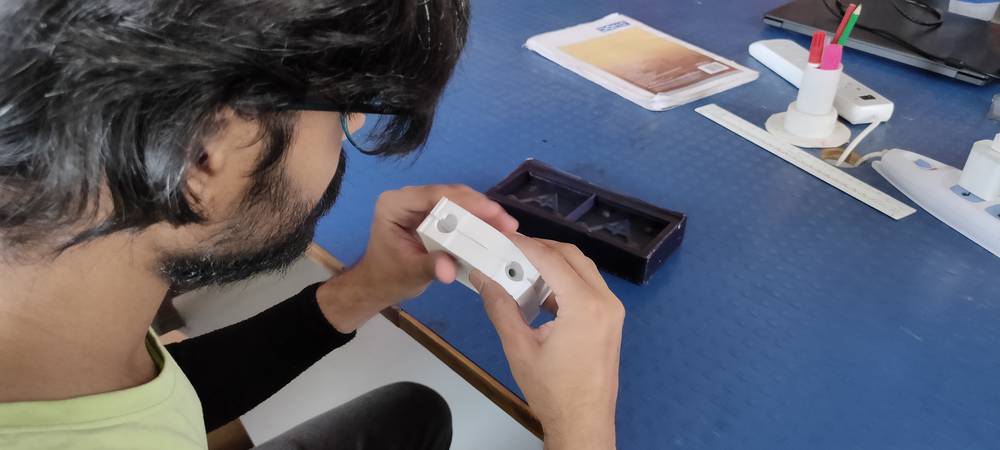
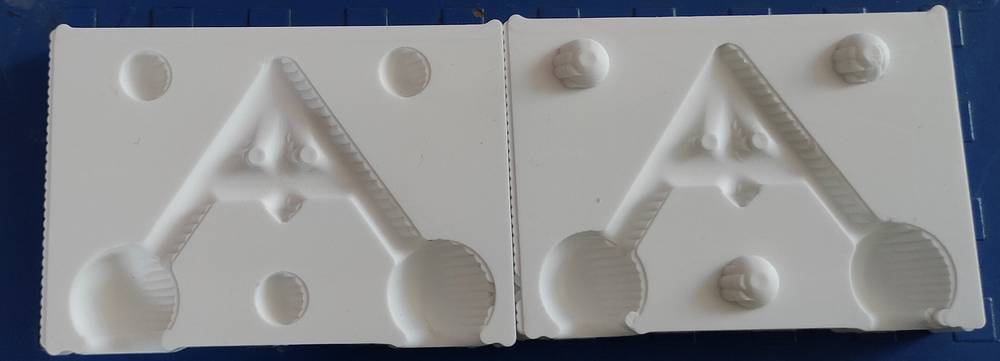
The rough surface of the wax mold did reflect in the negative mold and also there was some offset in the male-female joint(i checked the design
and the joints are mirrored),
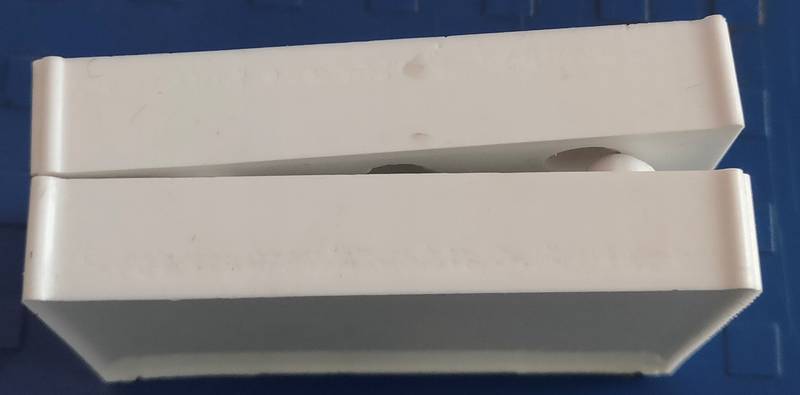
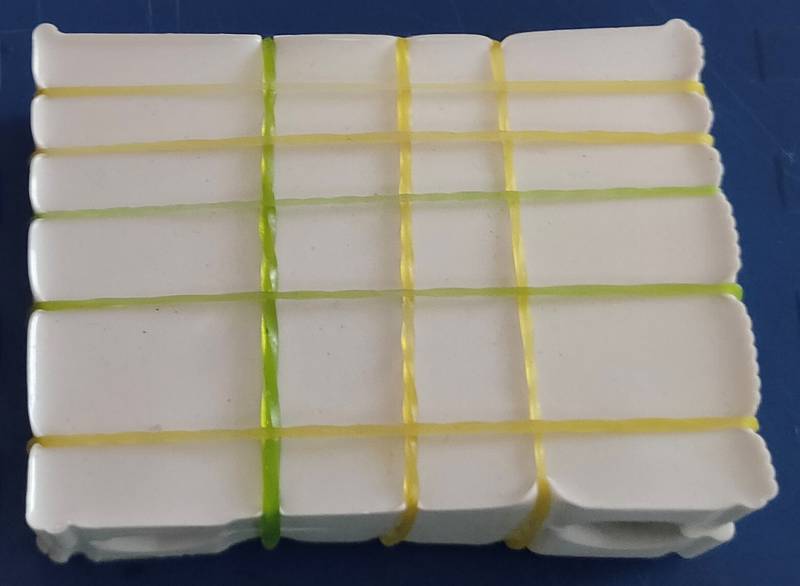
so i had to wrap multiple rubber bands around the negative mold/rubber mold to fix them together, i made sure that the rubber mold was not
squeezed
Making the positive mold
After the rubber mold was fix together with rubber band wrapped around, it was time to pour a casting material into it. I decided to use epoxy,
the crafty nibble one i tested during the group assignment.
Before fixig the rubber old together, i had poured water in it and took the weight
measurement of the water and with that measurement, i took the tentative measurement that i would need 25 grams of epoxy. So it would
require 18 grams of resin and 6 grams of hardner to make the epoxy. As mentioned above, the weight you'll see in the photo will be 3-3.5 grams
more which is the weight of the cup since the weighing machine was not able to set the measurement to 0 after placing the cup,
The empty cup,
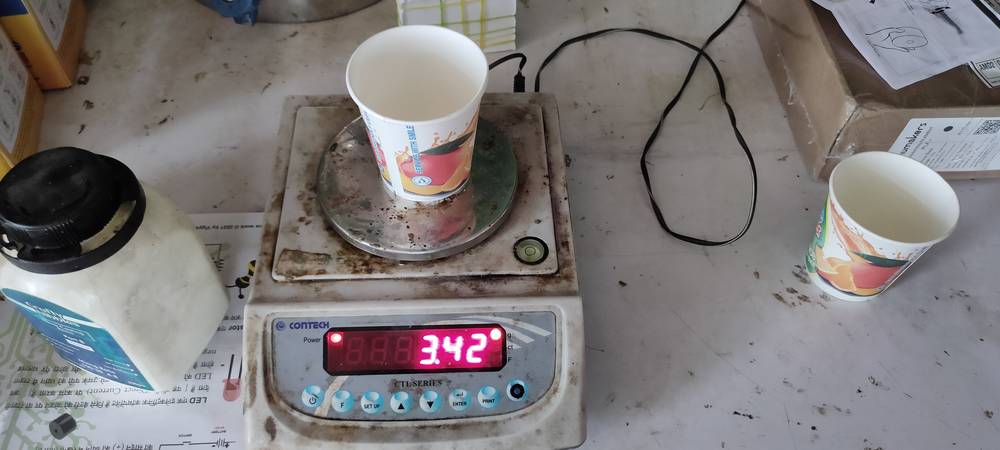
The resin: 18 grams (18 grams resin + 3.42 grams of empty cup),
The hardner: 6 grams,
After that i stirred the mixture for 3 minutes,
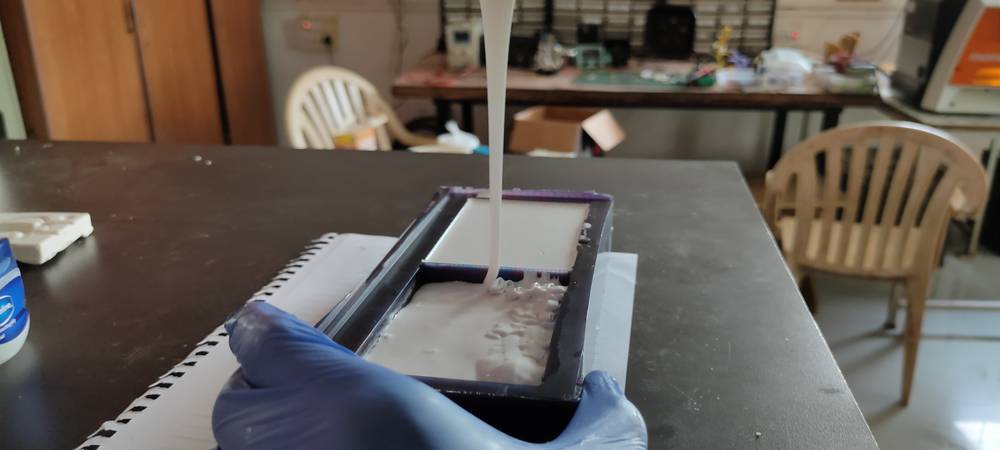
after the epoxy was ready i started pouring the epoxy into the rubber mold,
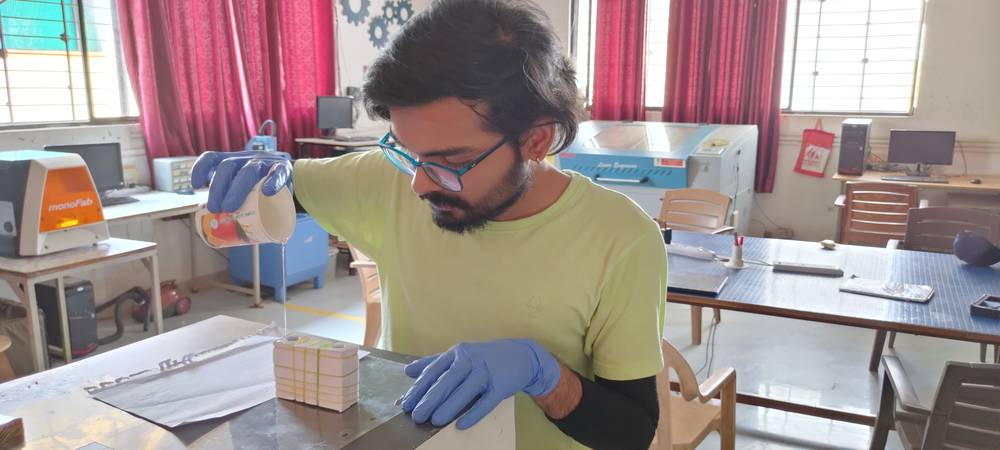
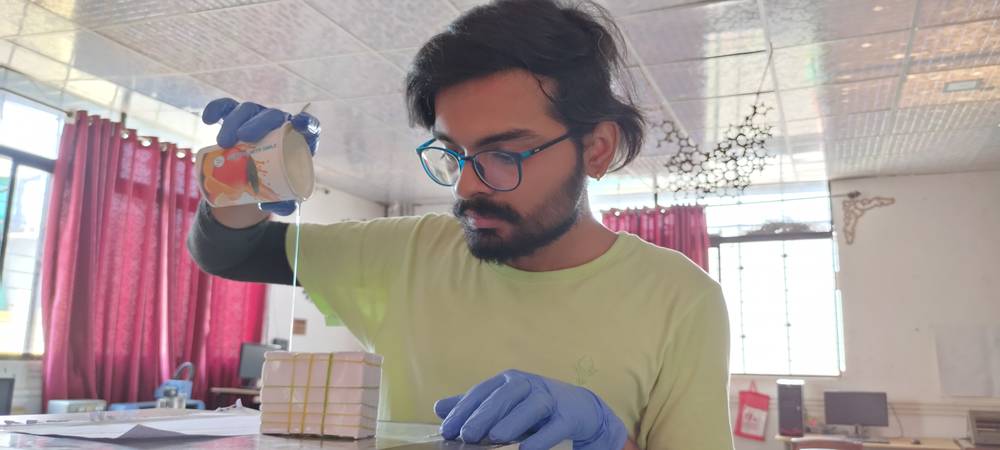
Fortunately/unfortunately the mixture of epxoy i made this time was few grams more(5-8 grams), however, because the rubber mold was not fixed
together properly due to offset in the male-femakle joints, the epxoy was leaking from the gaps of the rubber mold. So i had to continuously
pour the epoxy every 15-20 minutes for 1-2 hour to a point where all the extra epoxy that was left got used in re-filling the rubber mold. After
1-2 hour, the epoxy started curing and was becoming thich enough that it stopped leaking from the gaps.
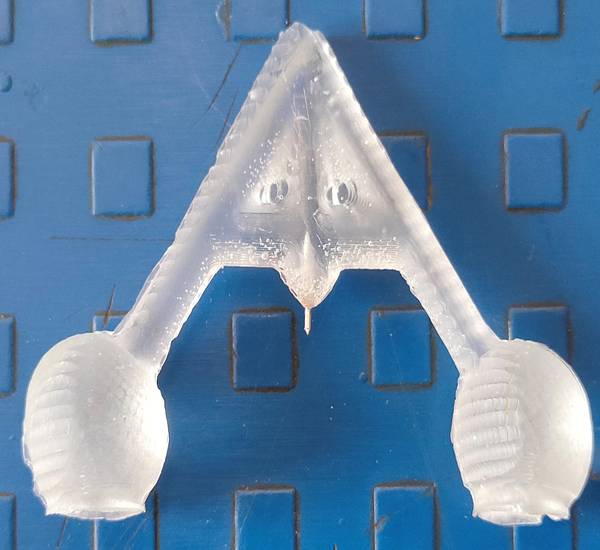
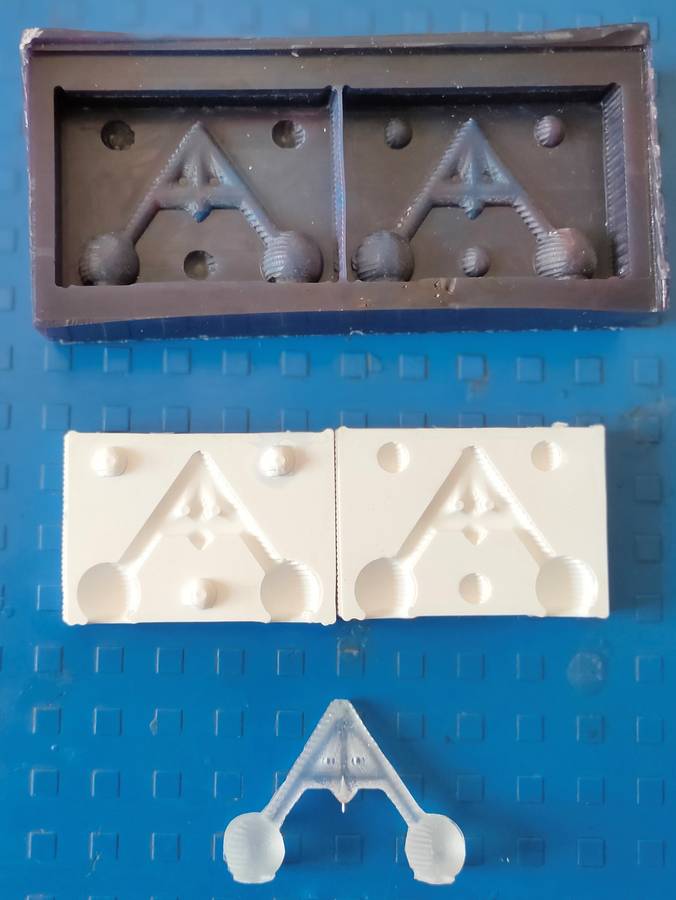
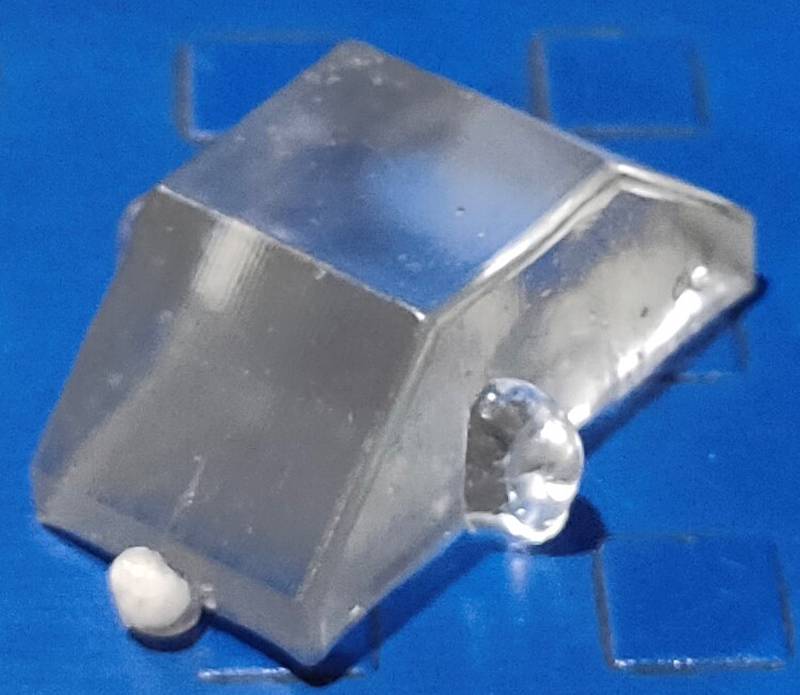
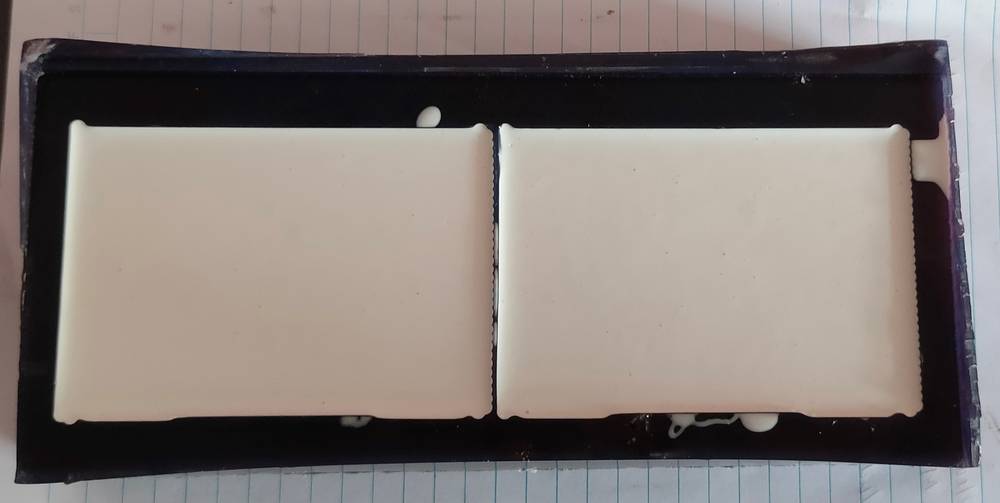
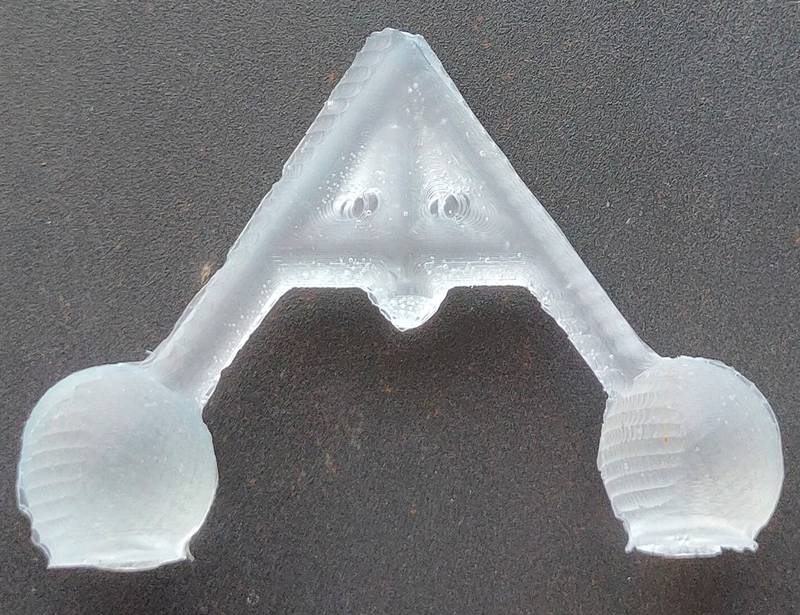
I let the epoxy cure for 24 hours and here is how is turned out,
(((vid 04)))
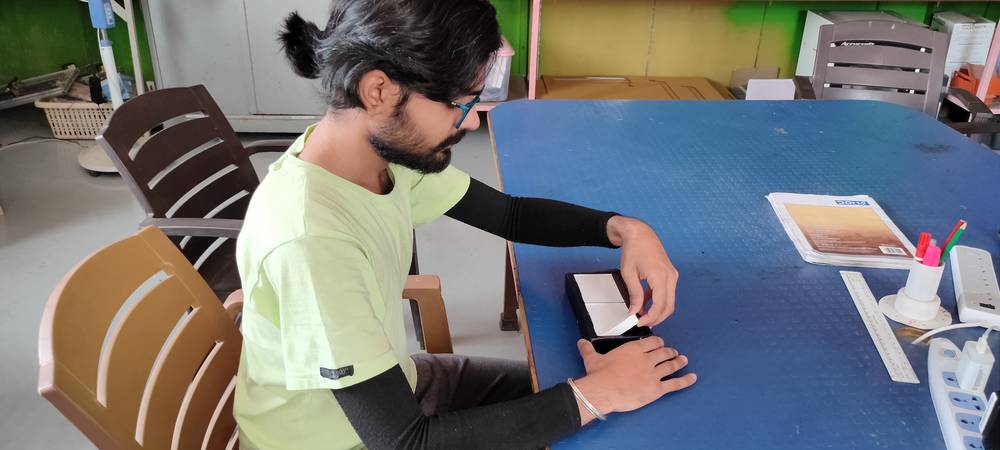
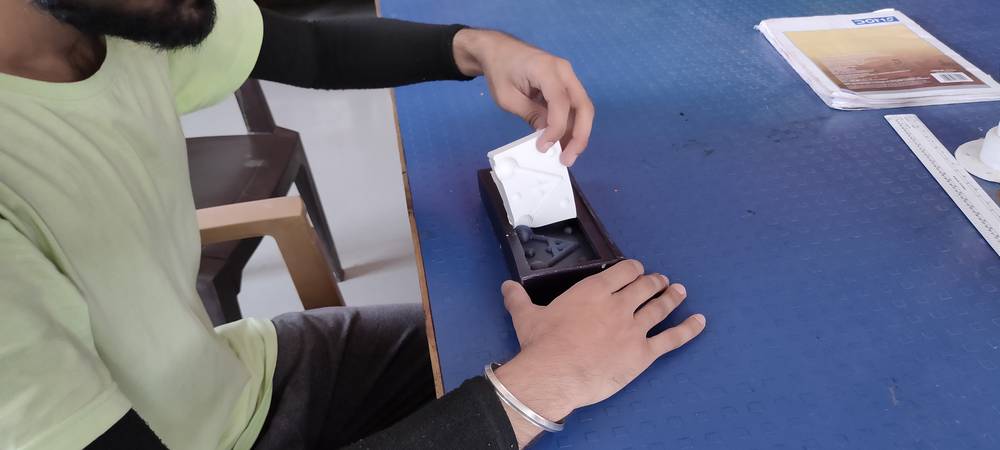
after little bit of cleaning,
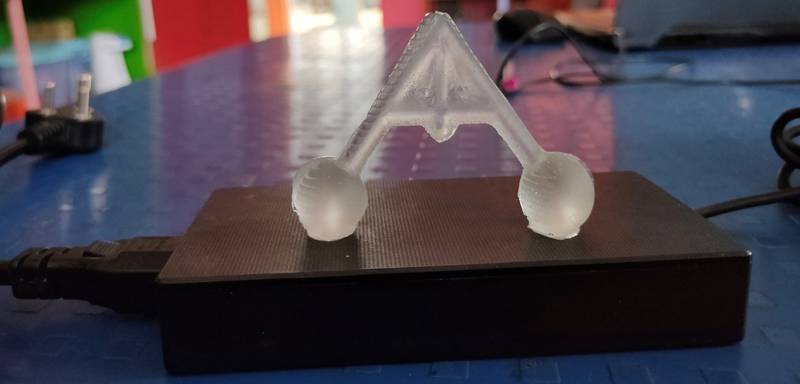
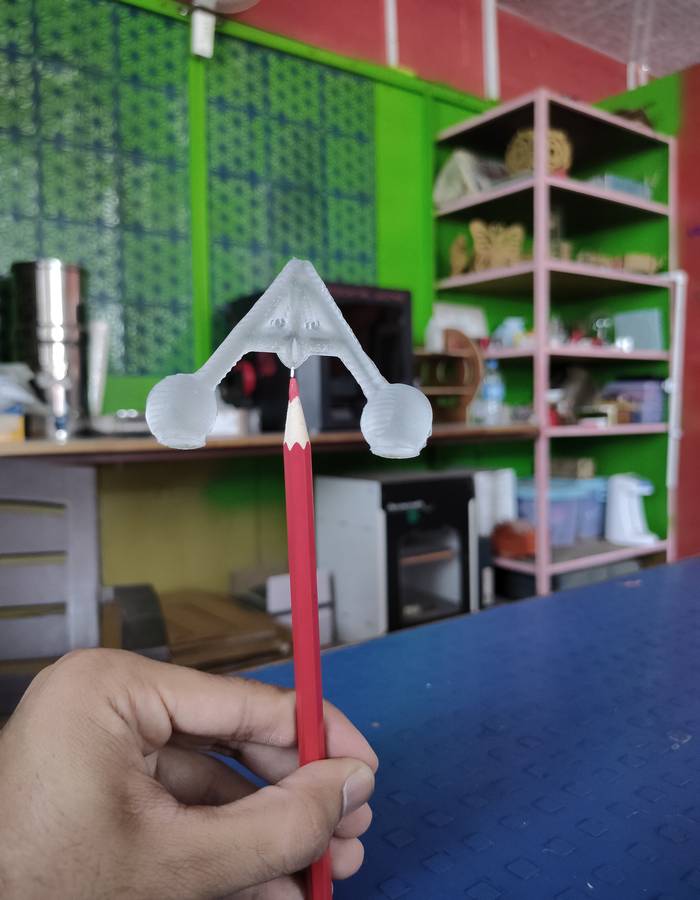
i trid to balance the toy onto a 3d printed bolt and here is how it looks,
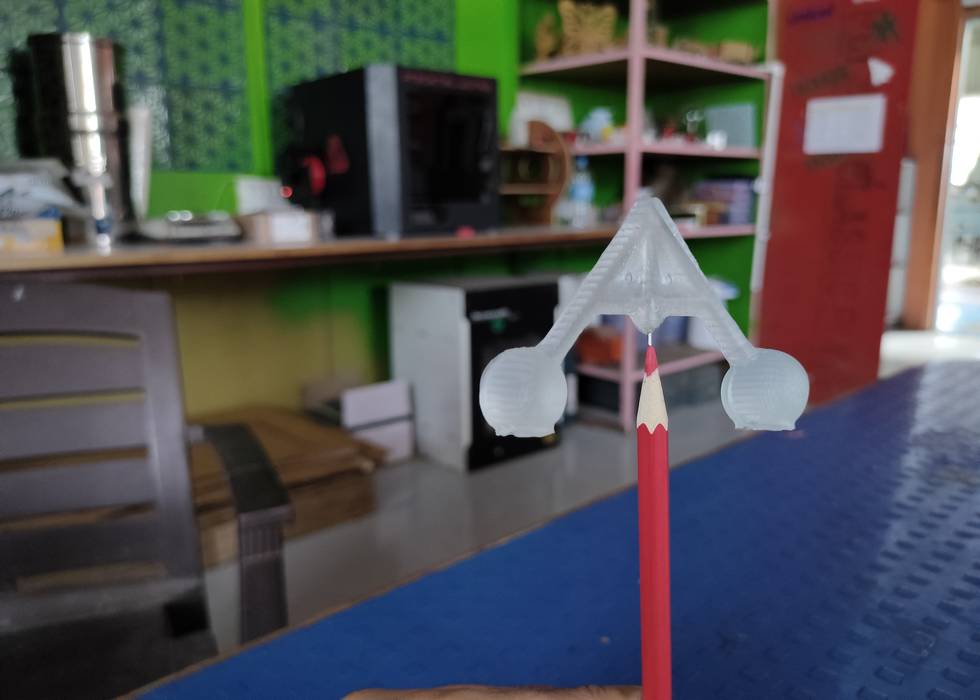
i then inserted a needle into the toy. I had to heat the bottom of the toy with heat gun to insert the needle,

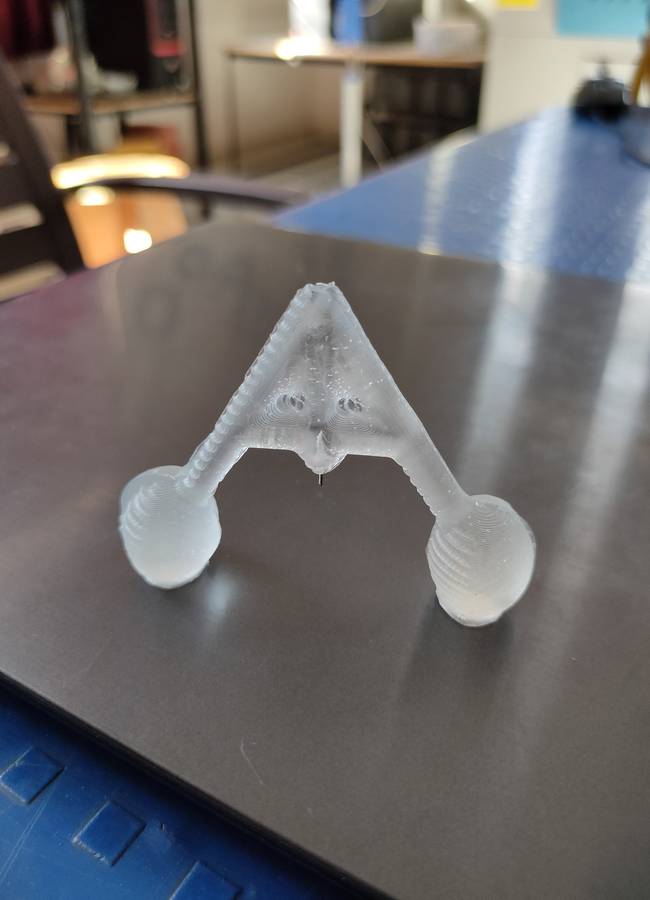
I tried to balance the toy with the needle inserted, onto the tip of the pencil and here is how it turned out,
You can downlaod the design file of mold from here:
self balancing toy
Drip Irritation by Fenil Chandarana is licensed under Attribution-NonCommercial-NoDerivatives 4.0 International![]()
![]()
![]()
![]()